Sunday, May 6, 2018

Regency essentials: A little white dress - part I

Today I'm here to show you a dress that I finished nearly two years ago. I made it for our second Gustavian day event in August 2016 and have, sadly, never worn it since. 


This dress was probably the quickest and easiest gown that I've ever made so it took me less than a week to finish. I should definitely make more regency gowns just because it's so relaxing! :)


The bodice has a crossover front. Later on I learned that for a more typical early 1810s look there should be a small triangle shaped piece (that could also possibly be the front of an under-bodice or under-dress/bodiced petticoat showing) between the sides of the front (see an example of this in the painting a bit further below).


 I scaled up a pattern for the bodice from Period Costume from Stage & Screen: Patterns for Women's Dress 1800-1909 by Jean Hunnisett and altered the front to have a crossover front. The sleeve pattern also came from the same book.


I decorated the neckline with cotton lace with a scalloped edge, to match with the scallops on the hem. 


This type of bodice seems to have been fashionable in the early 1810s. Notice how the neckline is much wider and lower cut than mine.
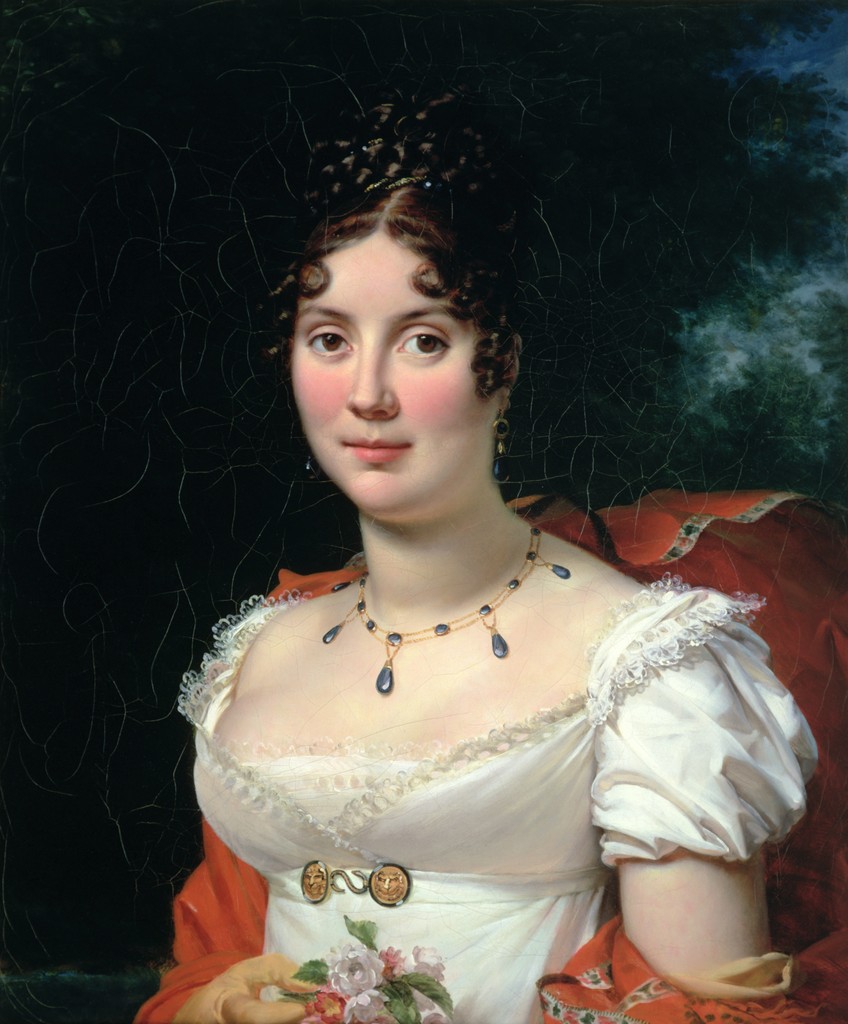
Portrait of a Lady by François Pascal Simon, Baron Gérard.

The neckline is pretty much the same as in this fashion plate.

Costume Parisien fashion plate, 1810.

My bodice closes with buttons and buttonholes in the back. 


(Please ignore the underpetticoat straps showing through the fabric. I didn't put all my white regency undies on my mannequin so that's why they can be seen here...)


I've also learned that this wasn't a very common closure method, although a lot of historical costumers go for it! I think I've only found four extant dresses a functional button back closure. Different kinds of drawstring closures seem to be much more common in the 1810s and I can totally now see why - they allow for adjust-ability, whereas there's none in button closure.

One example of a drawstring closure of a 1810s dress can be found in Costume in Detail: 1730-1930 by Nancy Bradfield (pages 103-104). (Also notice the corresponding v-neck design on both the front and the back of the gown.)


 I think I've only found four extant dresses a functional button back closure. 


And the fourth example can be found here.

When it comes to the construction of the bodice, I must admit that I totally improvised. Since regency isn't the main period I'm interested in (no suprise there ;)), I've decided I don't need to have as high standards for accuracy as I have with 18th century. Not that I have very high standards of accuracy with 18th century either (although it varies from project to project and apparently seems to get higher with time) but at least it's higher than with regency. With regency I simply cheat as much as I can, without having any too obvious machine sewing showing.

Hence, this bodice is mainly machine-stitched, and it is lined with cotton. Another option would have been to leave the bodice unlined and wear a bodiced petticoat, however, my petticoat doesn't have a bodice so I had to add a lining to the bodice. The underbust is fitted with darts in the lining and gathering in the muslin on the outside (as seen in the previous pictures).


The dorset buttons were ready-made (no shame!) and I didn't even bother to do the five buttonholes by hand. Thankfully, my sewing machine makes really nice looking buttonholes so maybe I can get away with them because they don't look obnoxiously clunky? :)


...unless you look really closely. ;)


I also constructed the bodice in the modern way by sewing up the lining separately and adding it to the outer fabric by sewing around the edges with right sides together. That way I was able to easily cover the raw edges of the lace as well, because they were sandwiched between the outer fabric and lining. When the bodice was finished, I joined the bodice and skirt and left the seam allowances unfinished on the inside of the dress and facing towards the hem.


This fabric was yet another lucky local fabric store find. It's embroidered cotton with a scalloped hem that just had to be made into a regency dress. It instantly reminded me of this dress in Kvinnligt mode under två sekel by Britta Hammar & Pernilla Rasmussen. There is also a 1810s dress with a scalloped hem in Regency Women's Dress: Techniques and Patterns 1800-1830 by Cassidy Percoco.


In fact, the pattern for my skirt is based on the morning gown (dated 1809-1819) in Regency Women's Dress (see pages 62-65).


Scalloped hems were also fashionable in the early 1810s. The extant v-neck gowns that I found also often (thought maybe not always) had a corresponding back like this (more examples of this can be found on my Pinterest research image board).

And another example of a scalloped hem can be seen in this painting below.

The Misses de Balleroy, 1805-1815, by Henri François Riesener

A close-up of the embroidery on the hem:


When I was scheduling this dress and thinking how fast it would be to put together, I didn't realize that I would have to finish all the long seams on the skirt by hand because the fabric is so sheer that unfinished seam allowances would show and look really ugly. So the dress took me a bit longer than expected but I was really happy with how neat and tidy the skirt looked in the end! 

Here you can see the side panel of the skirt and the flat-felled seams.


The result was so worth the effort and I quite fell in love with flat-felled seam finishing. Now I'm tempted to use this technique on all my skirts! (I'm not actually going to do it where it isn't necessary because it's a waste of time though!) ;)


And this is how the seams look from the right side of the dress:


As this post was getting really long, I decided to separate the photos of the dress being worn into another post which I will try to publish soon. In the meanwhile I am going to end this post with a couple of teasers and links. :)


My Pinterest boards related to this project:

I should also mention that I found Natalie Garbett's post about her c.1812 dress very useful when starting this project. :)


Since this gown was made two years ago at a time when I was just starting researching and sewing regency era garments, I have have learned so much more after that. I'm now thinking about getting back to this gown to make some alterations to the bodice to make it more authentic. This was my second regency gown and it was definitely still very much a learning project. 

Sunday, July 9, 2017

Christmas ball 2016

Since it's mid summer now, I feel like this is the weirdest time of year to make a post about last year's Christmas ball, but I thought I might do it anyway. Originally I actually didn't plan to make a post about the ball at all (hence the weird timing of the post). I just feel like the posts about this annual event would be too repetitive as the event is very similar each year (although there are some variations in the program). However, my photos do not vary t̶h̶a̶t̶ ̶m̶u̶c̶h at all - they're just photos of people sitting at tables and chatting/dining. But it's been a long while since my last post about this event (four years?) and there is one thing that varies a great deal each year and that is what people are wearing to the ball. So in the end, with this being a blog about costumes, I changed my mind about posting about this event. And I do think there are quite a few nice photos that I would love to have documented on this blog, so here we go!

The location of the ball was different to that of previous years.  I personally prefer this location, although it may be argued that it is too small a location for dancing. It isn't as dark as in the usual location at Tenalj Von Fersen.

There was a smaller group of us earlier during the day and more people would join us later in the evening for the ball. 


As usual, Johanna brought her lovely jewellery shop with her. She was wearing an early 18th century robe battante (a style that you, regrettably, don't often get to see being recreated) in beautiful yellow silk taffeta! 


The photos don't do justice to the jewelry sparkling in the candlelight. 


 On the left in the photo below you can see Heidi, who was attending first time, and Mia looking beautiful in the candlelight! These two gowns are sewn by Mia, and made with the Fig Leaf Patterns 101 that I also used to make my Williamsburg print gown last year. Oh, and they are both made from Ikea fabrics! Heidi's gown is made from Ljusöga duvet cover and Mia's gown is made with a fabric (that is no longer available) that she accidentally found on a site similar to Ebay. We actually didn't know the fabric was from Ikea until I spotted the same fabric on K. Walter's at the Sign of the Grey Horse blog! You can see more photos of these lovely outfits if you scroll down on Mia's Instagram.


And I wore a new dress that I have yet to blog about. I got my jewelry from Johanna and Mia did my hair which was quite big this time!


Another lovely photo of Heidi. 


It is so lovely to see some Swedish guests attending every year!


This is my favorite photo of our squad from the evening!


There's also a full-length shot of us, taken with Mia's phone so it's grainy. (And I'm amused by how much shorter I am than the other two ladies.)


It is so lovely to see some Swedish guests attending every year! Below is Elisa (of Isis' Wardrobe), wearing a beautiful late 17th century-early 18th century mantua, of which she has blogged about. 


Here's Anna, wearing a gorgeous mantua, and Maija in her lovely pet en l'air that can be turned into a Brunswick (the photos on her website will have you drooling!)!


Pia singing.


It was wonderful to meet Fredrick Ell (on the left) who was also attending the ball for the first time and chat about sewing with him! He has a Facebook page about his work, if you're interested!


I feel like this is an appropriate photo to end this blog post with, as Patrik's (whom you can find on Instagram as well) expression sums up how exciting it was to attend the ball! ;)


(Isn't it funny how this event is a ball but there are no photos of people dancing... 😅)

Wednesday, April 26, 2017

My second robe en chemise

This robe en chemise was a very quick and dirty project. The idea was to make something fast while trying out a pattern that I had been altering to fit. I was never entirely happy with my first robe en chemise that I had made for myself, so I wanted to make another. Design-wise it's really similar to the first gown, but there are some subtle, yet significant differences. Most notably, it's worn with a pair of 1780s stays, unlike my first robe en chemise that was made to go over my white 1760s stays, as mentioned in the original post about it. 


I've had the chance to wear this gown to an event twice already. The first time was to an informal 18th century gathering in February and I actually felt a bit overdressed for the simple occasion.


I wore the gown with my old bum pad that is smaller than the one I usually wear (for 1780s gowns). This bum pad doesn't extend to the sides so it's more appropriate for the early 1790s look that I was going for.


I'm not entirely happy about the amount of fabric in the back of the skirt because there's not much - with the bum pad it looks kind of sad. I had a very limited amount fabric so I ended up using every bit I had without having to piece the bodice or the sleeves. With so much gathering in the front, not as much material was left for the back.


Mia did my hair, as usual.

Photo: Jarno Manninen

Photo: Jarno Manninen


And then I also wore the gown to L'Amusette's annual spring ball last Saturday. The theme was French Revolution so the gown was accessorized accordingly.


There was no bum pad.


This time my hairdo was inspired by the simpler styles appearing in the 1790s as fashion transitions towards neoclassical style.


Under the gathered front, the gown has fitted front panels that are tied with five pairs of tapes at center front. This closure method is based on an extant dress in Musee de la Toile de Joyu. If you take a look at the photo in the link, you can see that the panels are unevenly stretched where the ties have pulled the fabric. To avoid this, I added bones to the edges of the panels.


Twill tapes were sewn to the underside of the center front panels to create casings for drawstrings.


The drawstrings are tied and hidden under the center front. 


The back is very simple. 


None of the photos of the finished gown so it very well so here's an in-progress photo before attaching the skirt and sleeves:


Oh, and there's a bonus - a little video clip that Mia took on her phone at the Spring ball! :) 


My Pinterest research boards related to this project:

Thursday, March 2, 2017

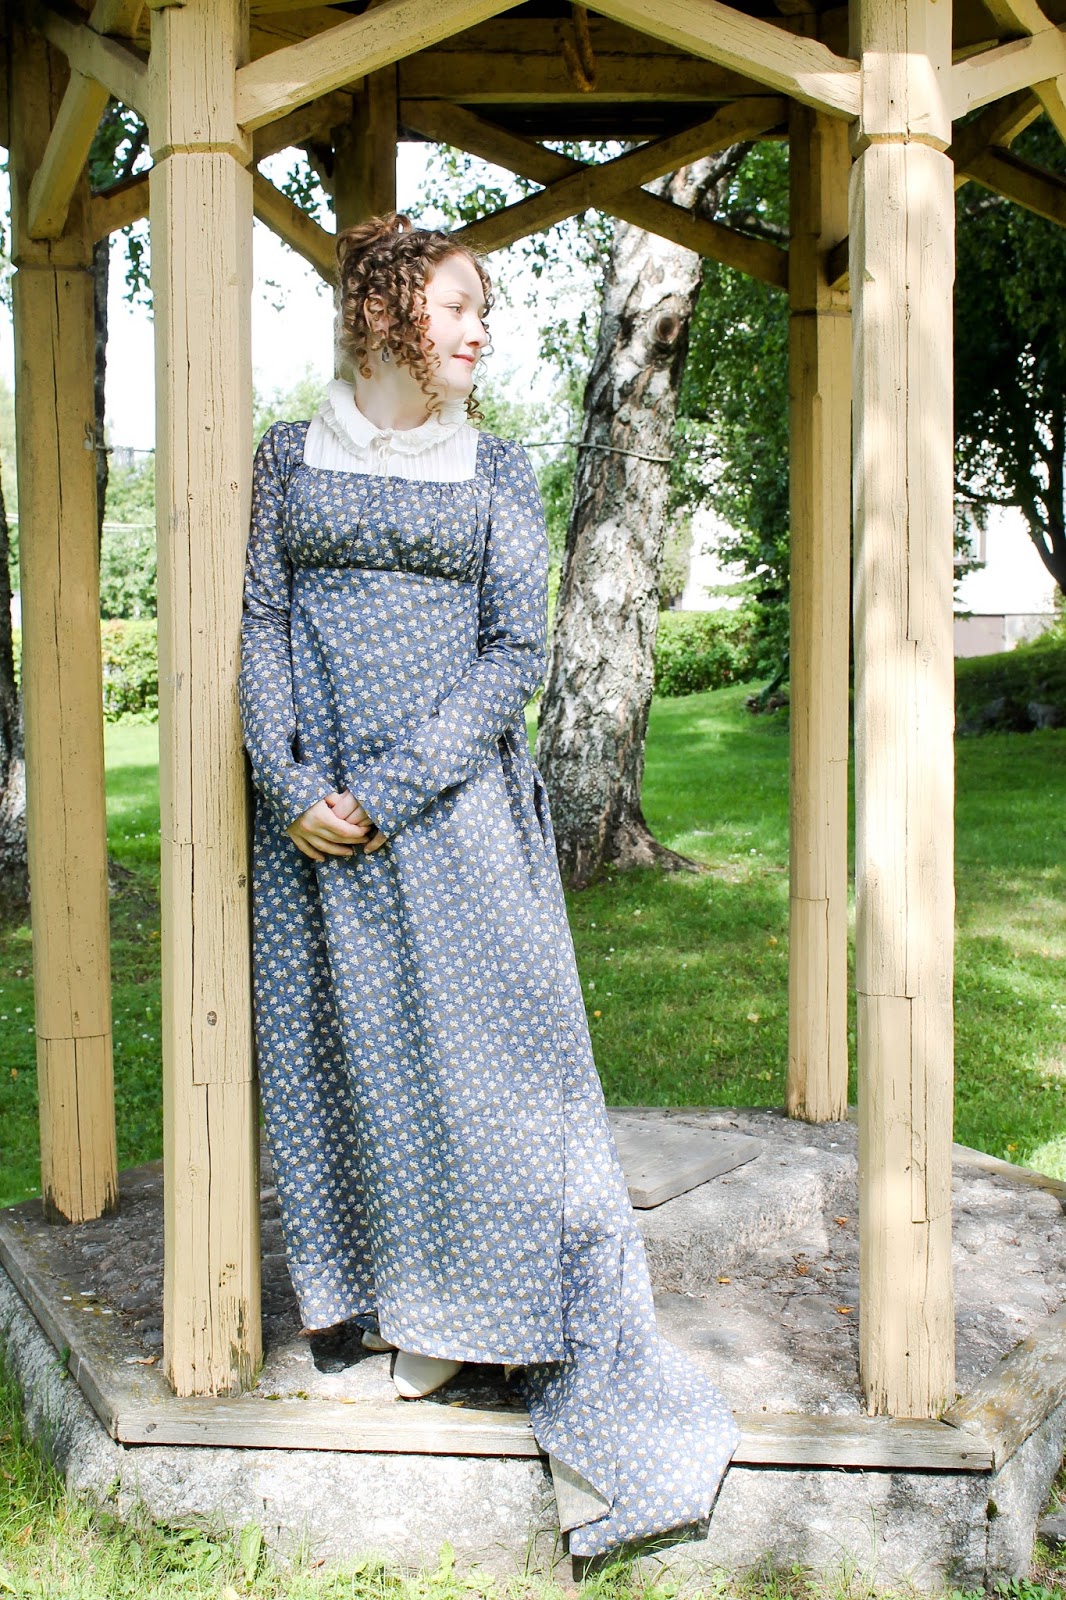
Regency day dress (Laughing Moon Mercantile #126)

By arranging the Gustavian day event in Vaasa two years ago, Noora gave me a reason to make my first regency gown - so I finally did. She has been talking about how easy regency gowns are to make for probably as long as we've known so I guess it shouldn't have come as a surprise that making a simple gown like this was quick and easy but I still couldn't help being positively surprised. Had I not worked on it a bit by bit in the evenings and mornings so that it took me a month or so to finish, I think the dress could have been done in much less time. It really had been too long since I could properly enjoy sewing so this gown really was a much needed relaxing project for me at the time, too.


The fabric was a remnant find from a local fabric store. I had seen it earlier there and hadn't bought it because at the time I didn't think I was going to be doing regency so soon but the second time I looked at it I couldn't stop thinking about getting it so I only had to ask for Noora's opinion before I could come to a decision. Looking back now I don't know why I hesitated so much because I think it's quite perfect for the era as well as a color that I love. ;)

Here you can see a close-up of the fabric, in a different lighting (indoors):


And later I even discovered an original dress that was made out of a fabric that reminded me of my find. Yay!


Knowing the fabric would make a lovely day dress, I simply started looking around for regency day dresses on the net and eventually found the following fashion plate (from 1801-1802), which became my main source for inspiration. 

Source: Bibliothèque des Arts Décoratifs via SceneInThePast.

I really like how the back side of this dress looks pretty similar to the fashion plate.


This was also my very first time using a commercial pattern for a historical dress. I had read a few positive reviews about the Laughing Moon Mercantile's stomacher front dress so I decided to give it a go. And yes, it was as great as everyone is saying. I only did some alterations to the pattern before making a mock-up and it fit perfectly. Construction-wise I deviated a bit from the modern instructions - although still making the internal seams on the machine - and added a third pair of ties to the middle of the closure in the lining (the pattern suggests only two pairs but I was afraid that it would cause awkward pulling).


To see other gowns made from this pattern check out Lauren's, Erin's or Dixie's lovely versions.


I would also like to thank to Mia for creating my lovely hair-do (as seen from the back above) and Noora for letting me borrow her chemisette, as I don't have one yet. :)