Thursday, January 2, 2014

Naval riding habit inspiration

The time has come for me to make a riding habit, another one of those projects that I've hoped to make for so long, maybe even longer than any other project. As a child, much before I got into costume making, I used to be interested in pirates as well as naval history. So I've been hoping to make a naval inspired riding habit ever since I realized it would be a much better option than making a naval officer's uniform for myself. The design started to evolve when I stumbled upon a naval inspired riding habit on deviantArt but the original photo got deleted from the site a long time ago so I can't link it here. But I had to mention it anyway because I don't want to take credit from something that wasn't originally entirely my idea.

Anyhow, my major source for inspiration comes from the naval uniforms of National Maritime Museum, which I visited a few years ago. My favourite type of uniform is the full dress uniform of a captain, from 1774. If you've read my post about the floral robe à l'Anglaise, you surely understand why. The reason why I didn't start making a riding habit earlier than this is that I hadn't found suitable wool for it. But a few months ago I did, when I was out visiting the local fabric stores with Noora. I also hadn't found good linen for the habit shirt, but Couture Mayah kindly sent me some linen for it some time ago. The only material I'm still missing is the trim but I'm ready to start making the outfit now because I can order it later.

A Portrait of a Lady (1747) by Roberet Harvie.

At first, I wanted to make the outfit in the 1770s style so I had already bought a pattern for it from Reconstructing History, but after seeing this painting, I changed my mind. Especially because I still have some fabric left from the recent robe à la Francaise that I plan to use for the waistcoat. The details that I love about this painting in particular: The lace collar with a black bow.


And the mariner's cuffs, plus the golden trim.


 For comparison, here are some painting of men in naval uniforms.

Captain Horatio Nelson (1781) by John Francis Rigaud.
John Jervis, Earl of St Vincent (1769) by Francis Cotes.
Captain James Cook (1775-76) by  Nathaniel Dance.

Mrs. Epes Sargent (Catherine Osborne) also wore a blue riding habit for her portrait. But I don't like the wide ribbon tied around her neck with two bows in the front and back because it's quite large. And isn't that pale pink bow in her hair just a bit silly? Maybe she tried to add a feminine touch to the stiff, tailored outfit with it but I don't like it. I also prefer the coat open in the front so that you can see the vest. 

Mrs. Epes Sargent (Catherine Osborne) by John Singleton Copley (c. 1764).

Nancy Fortescue looks fabulous in her blue riding habit, though. I love the tassels!

Portrait of Nancy Fortescue (1745) by Thomas Hudson.

This picture is very small but you can see the lady in the blue riding outfit has got a coat with ermine cuffs and collar. 

Trevelyan family of Wallington, Nothtumberland, English school (1745-50).

For more blue riding habits and uniforms, take a look at this Pinterest board.

Friday, December 20, 2013

18th century stays - tutorial - part 2

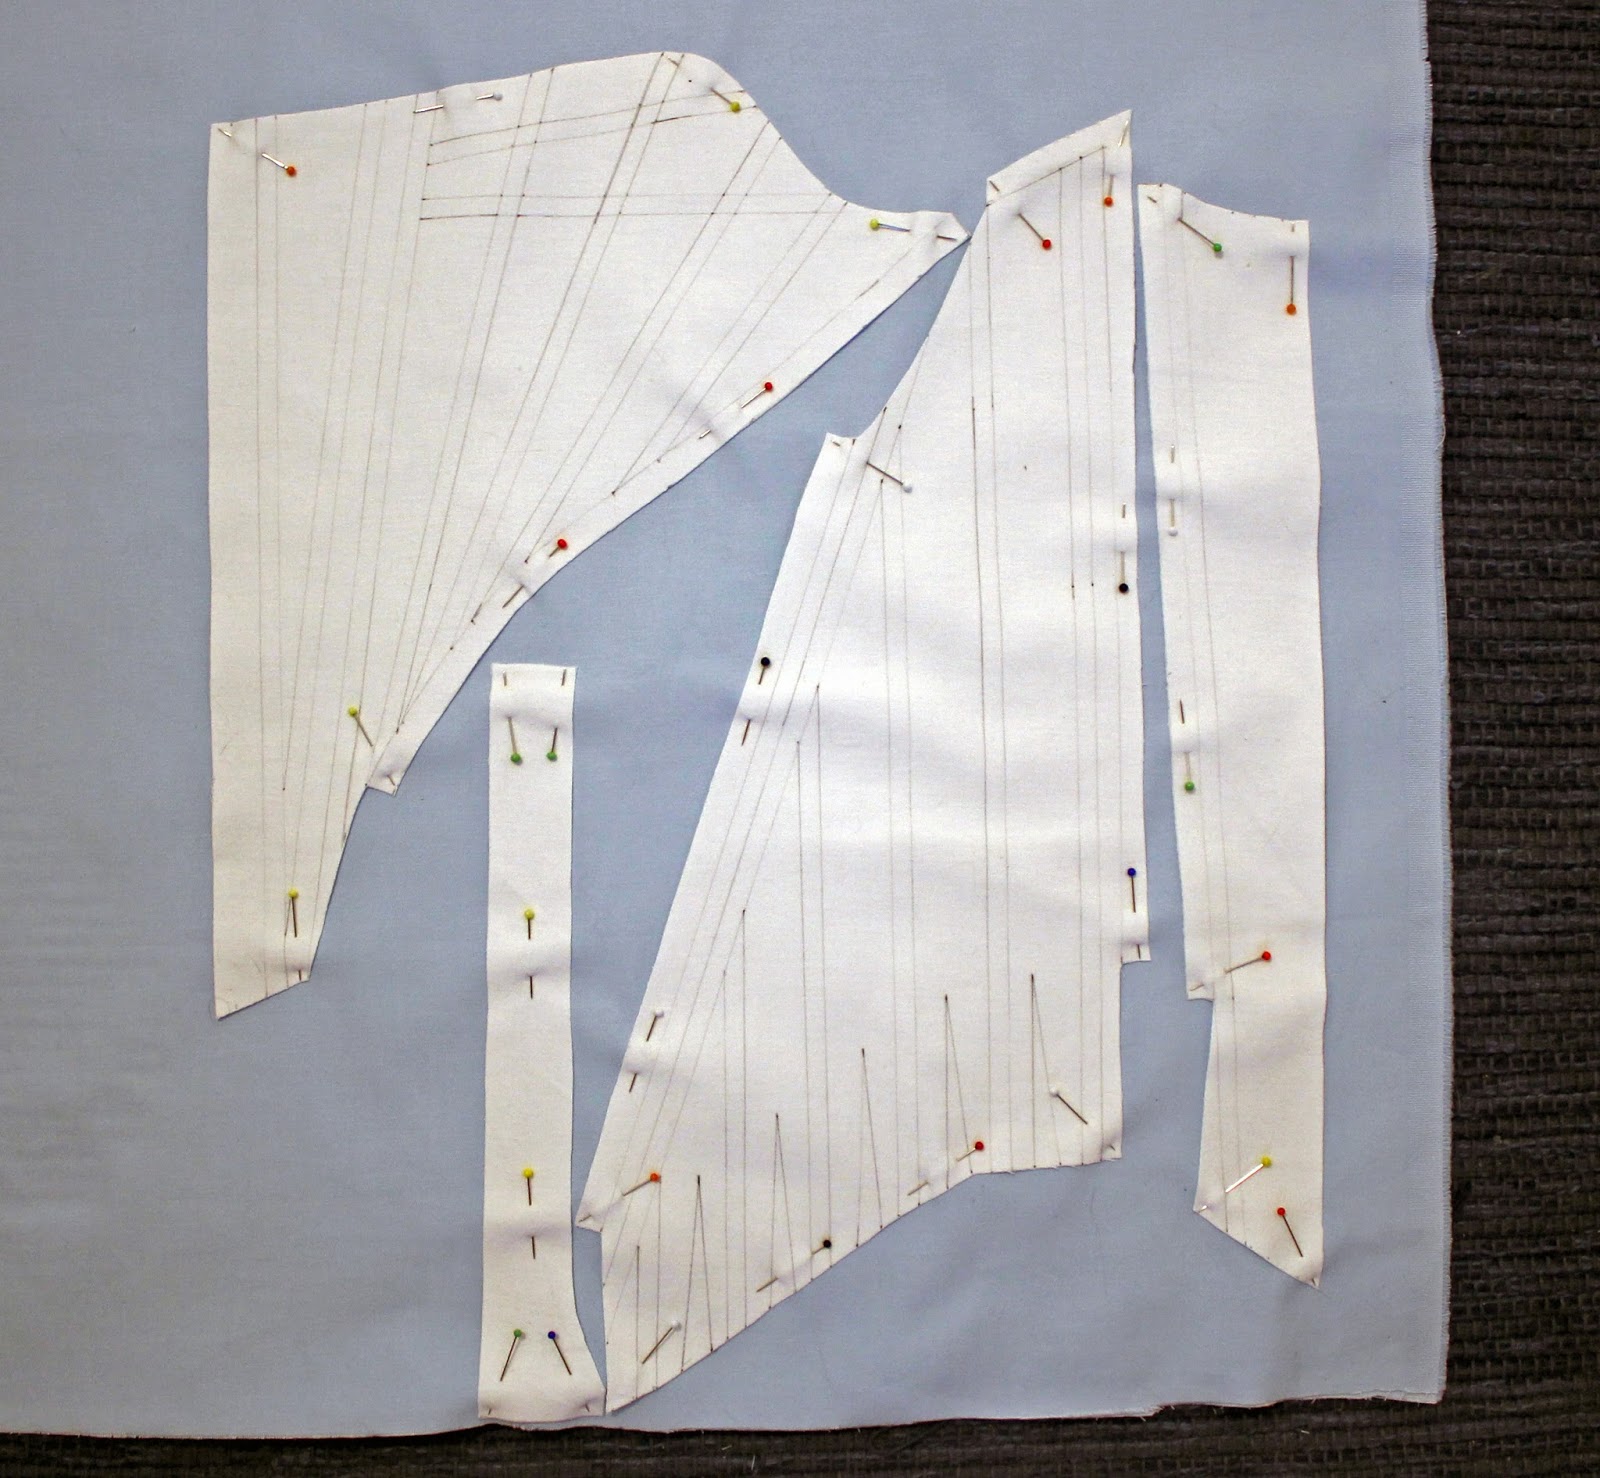
Moving on with the stays (part 1). After drawing all the boning channels to the panels, pin the middle layer pieces on your exterior fabric. I really recommend linen or cotton for exterior fabric for beginners because they're both easy to work with (and comfortable materials, too). 

In case you're not sure what would be an appropriate color or material for your stays, take a look at these boards I've created of extant stays on Pinterest:


As you can see, I chose pale blue for these stays. I had hoped to use yellow with blue stitching but I wasn't able to find any suitable yellow fabric locally so I simply used what I already had in stash. 


Since you already marked most the seam allowances to the middle layer, you just have to add around 3 or 4 cm (depending on the width of the boning channels) to the center front and center back panels. This is the part that will cover the raw edges of the middle layer. It will also make sure your lining won't show from underneath. You could also finish the raw edges with binding but it seems to have been a much less common way to do it.


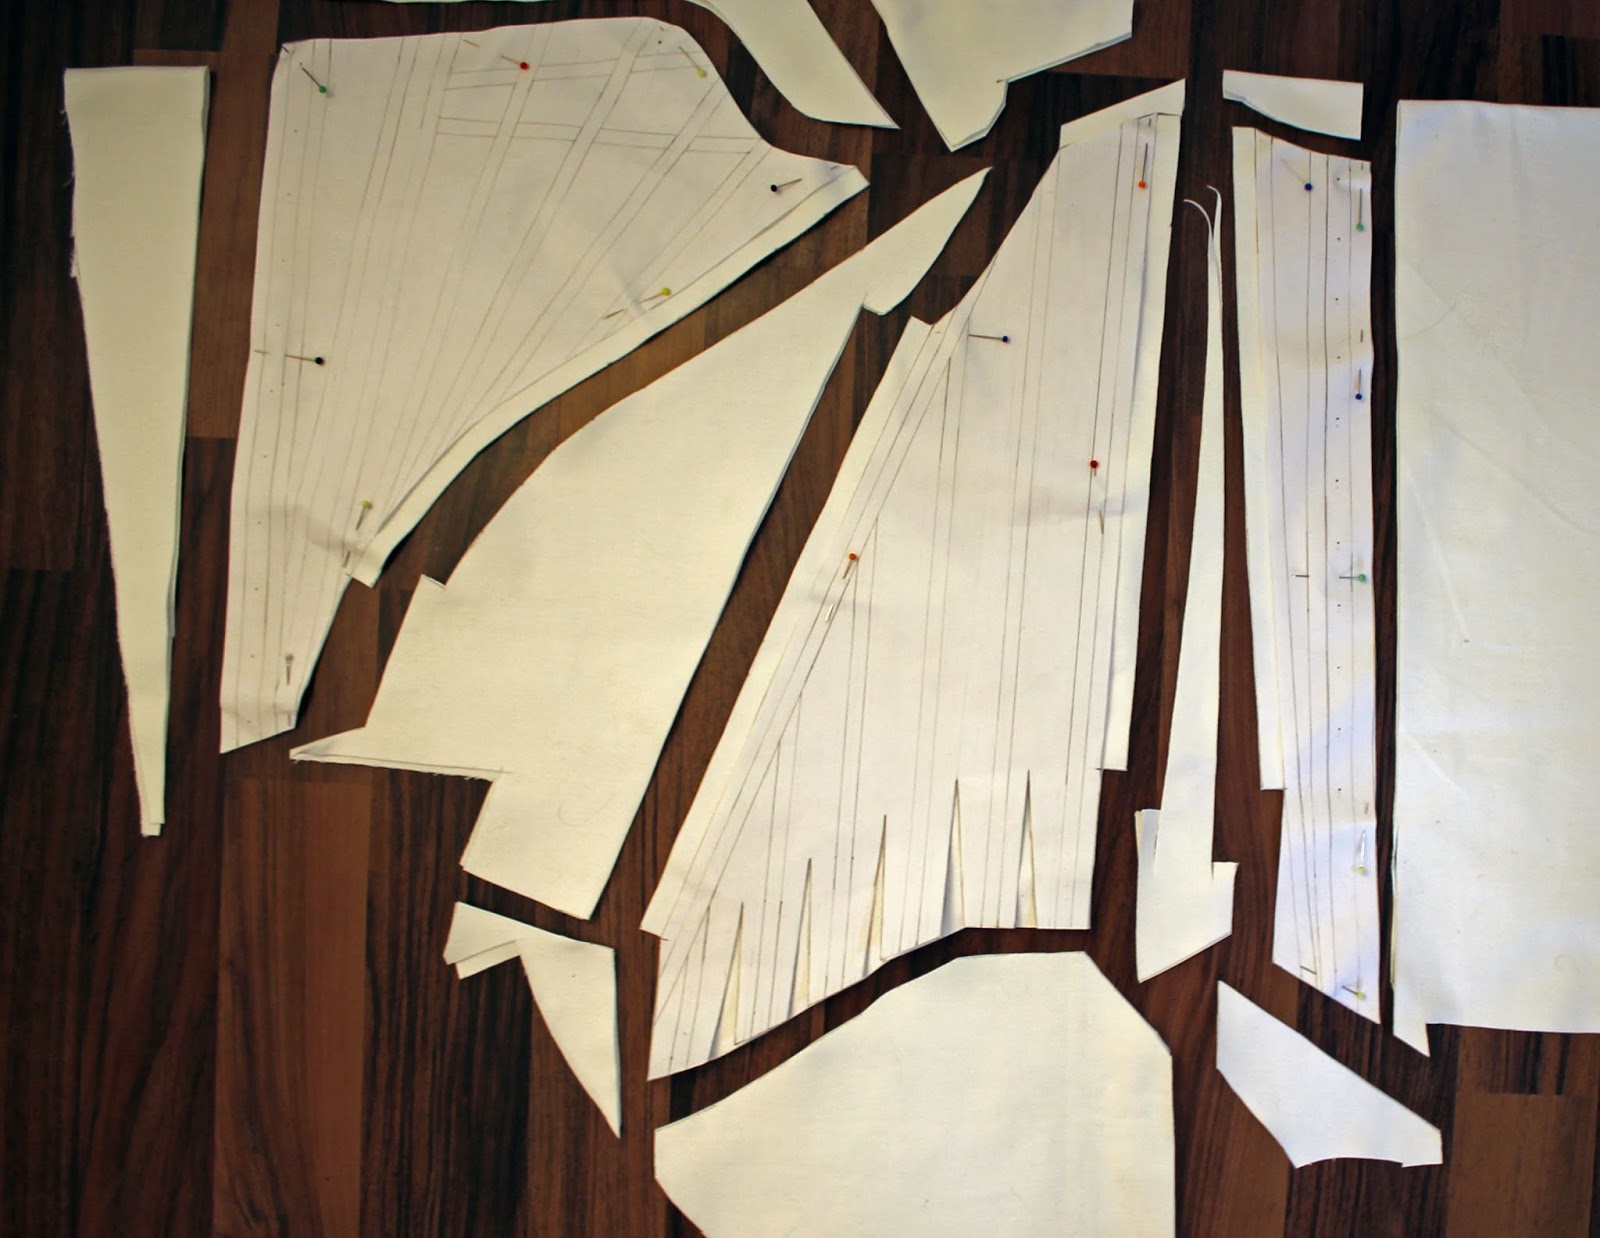
And now you're already ready to cut...


After cutting...


...it's time to get out your sewing machine and start stitching! Unless you're doing it by hand, of course. 

Tip: Start stitching the channels at the ends of the lines where the channels cross so it's easier to hit the right spot with the needle at the beginning. When you're sewing with the machine, it's hard not to stitch over the crossing lines if you start at the edges of the panels. 


Also, you don't have to tie knots to all the thread ends if you continue stitching the channels to the seam allowances. At the edges of the panels, secure the thread ends by sewing a couple of stitches back and forth so that they can be hidden by the binding.


I'm experimenting with a new technique here. Normally I would add small pieces of fabric for the horizontal channels but this time I'm simply going to put both the horizontal and vertical bones between the exterior layer and middle layer.


Sew all the boning channels, except the two channels next to center front and center back.


Cut off the thread ends at the edges of the panels.


Secure the rest of the thread ends by tying knots to them.


I also like to hide the thread ends between the layers, although it's not necessary because the lining will cover them anyway.


Then fold the 3cm wide parts that you added to the exterior panels earlier at center front and back to the underside of the layers and iron.


Cut off the excess.


And now you can stitch the rest of the boning channels through the three layers of fabric. To make it easier, you can also draw the channels on the underside.


And you're done with all of the channels.


Shorten the stitch length and stitch around the tabs about 2 mm away from the edges (meaning the lines that were drawn earlier). However, make sure you leave the ends of boning channels open so you'll be able to put the bones in later!


Do the same for the lower edges of the front and back panels.


Remember to stitch around the shoulder straps as well.


After you're done with all the panels, you can stitch them together.


Press the seam allowances open.


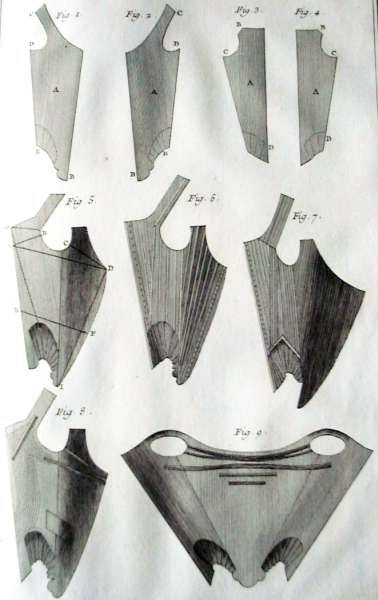
And now put the bones in. If you like, you don't have to cut the bones for the first fitting. But if you do, remember to make the ends of bones round so they won't tear the fabric. You can use cable ties or if you want to use a more period accurate material, reed is fine. Metal bones work, too, but I wouldn't use many of them because otherwise the stays might end up very heavy. The best places for metal bones are next to the lacing holes at the center back (and front). You could also use metal bones to reinforce the stays on the inside, as suggested in the Encyclopedié.


After all the bones have been put into the channels, you can close the ends of the channels. Secure them by backstitching.


Then cut out the parts between the tabs.


Add the shoulder straps and you're ready to start making the lacing holes! They could also have been done before sewing the panels together but it doesn't really matter in which order you do it.  


I will post the next part of the tutorial sometime after Christmas or New Year by latest.
Happy holidays everyone! :)

Wednesday, December 18, 2013

Thoughts on the striped robe à l'Anglaise

I didn't want it to come to this... But it did... I realize that the striped robe à l'Anglaise has got way too many issues for me to ignore them any longer. So among a lot of other things, I've been thinking about revamping it for a while. The issues aren't so obvious you could tell them from photos right away - but I surely can spot them when I look at the photos. Most of them are caused by lack of patience to fit and finish the dress properly and carefully. But revamping yet another dress doesn't make me feel very excited. It makes me feel the opposite way. I don't feel like taking it completely apart just to sew it back together the same way it used to be.

However, some time ago I stumbled upon a similar striped robe à l'Anglaise on Ebay - someone probably linked it on Facebook but I can't remember who it was - and it gave me some good ideas about how I could change the construction techniques for the better as well. I really like that the seam allowances are turned on the inside of the dress. It has got at least two benefits: The bones can be put into the channels created by the seam allowances and, since my fabric is quite sheer, the seam allowances also won't be seen through the fabric on the outside of the dress like they do at the moment.


I pretty much know how to fix the problems with the fit so it wouldn't be too much trouble. But... Meh. The dress has been worn out to an event twice by now and I'm starting to get tired of wearing it already. I hate to feel that way but it's how it is. And it really should be mentioned that there are also a couple of stains on the outside of the bodice and they won't wash off so it can't be left as it is. So what should I do? Give the dress another chance? 

...Or should I make something completely else from it...? There's probably a couple of meters of the striped fabric left in the stash so I could definitely do that as well. And since I have very high expectations for the pale blue robe à la Polonaise, one option is that I could make a sort of "practice" version of the polonaise from the striped fabric so I wouldn't have to worry about something going really wrong with the pale blue one because I will be able to tell the things that need to be changed from the first version. And don't you just love the striped polonaise from Kyoto Costume Institute...? And wouldn't a striped pet en l'air jacket be so cute as well?

At the moment I'm still working on the stays and the next part of the tutorial will be up probably later this week. I just can't stop thinking about the striped robe à l'Anglaise while I'm working so I wanted to write this down and ask what you think about it so maybe it will be easier to decide what to do with it.


Also, thanks to Isis, I received this new book in the mail yesterday! It has got several patterns, too. Some of them are available on the net - here - but there are also many that aren't. I wasn't expecting the book to have quite so many patterns so I'm positively surprised. Yay!

Monday, December 16, 2013

18th century stays - tutorial - part 1

My friend Ida really needs a new pair of stays and now that she's in town it is time for me to put all other sewing projects on hold and start making them. Since her old stays were made by me around five years ago, they were in a very bad condition with torn lacing holes. They didn't fit right either so naturally they were quite uncomfortable, too. These are the very same problems that I had with all of my earliest stays. So, now I wanted to make her really comfortable stays with as little boning as possible. Because stays is my favorite 18th century garment to make, I decided I might as well take some photos of the construction I'm using for these stays and make a tutorial so that maybe someone who is just starting out with stay making will find it helpful. By no means, this is not the historically correct way to make stays - it's the easy and speedy way to do them. So in case you're a beginner or the kind of person who needs to make stays in short amount of time, this tutorial is for you. However, I'm not going to write about how to draft patterns for stays because there are so many ways to do it so this is simply a tutorial that will show you how to put together a pair of stays relatively quickly. 

My friend is quite small and her old stays were a bit too large so I removed two tabs (one from the original seven tabs on each side). This pair will be laced both from front and back and has got only three panels on each side instead of the usual five panels. Having only six panels altogether is also a way to squeeze time away from the construction. So here's the starting point: The pattern pieces have been pinned to the middle layer of the stays. This layer is sturdy and heavy, tightly woven upholstery cotton. 


First, mark the seam allowances. I'm using 1 cm seam allowance because I'm almost certain these stays will fit right, or they'll need just slight alterations. If you're not that sure about the size and fit of your stays, use wider seam allowances.


Draw the lines by connecting the marks.


And here's a photo with all the seam allowances having been drawn. Notice there are no seam allowances on both center back and front because this is the middle layer of the stays and the raw edges will be covered by the outer layer, that will be folded over the edges to the underside of the stays.


Draw lines around the tabs.


Cut out the pieces, except the parts between the tabs.


Remove the paper pattern pieces.


Don't forget to cut the shoulder straps either!


Now move on to marking the lines for boning channels. Start from marking the ends of the lines to the edges...


...and to the seam allowances...


Poke small holes through the paper in the places where the lines don't meet the edges.


Draw small marks through the holes.


Remove the pattern. This is what you should have.


Now you can easily draw the lines for the boning channels by connecting the marks.


The result...


You can see the lines through the paper so draw the ends of the lines to the other side of the paper so it will be easier to mark them as well. Once you're done drawing the boning channels to all of the middle layer pieces, we're ready to move on to the next part.


Next part of this tutorial will be about cutting the outer layer and sewing the channels.