Monday, December 16, 2013

18th century stays - tutorial - part 1

My friend Ida really needs a new pair of stays and now that she's in town it is time for me to put all other sewing projects on hold and start making them. Since her old stays were made by me around five years ago, they were in a very bad condition with torn lacing holes. They didn't fit right either so naturally they were quite uncomfortable, too. These are the very same problems that I had with all of my earliest stays. So, now I wanted to make her really comfortable stays with as little boning as possible. Because stays is my favorite 18th century garment to make, I decided I might as well take some photos of the construction I'm using for these stays and make a tutorial so that maybe someone who is just starting out with stay making will find it helpful. By no means, this is not the historically correct way to make stays - it's the easy and speedy way to do them. So in case you're a beginner or the kind of person who needs to make stays in short amount of time, this tutorial is for you. However, I'm not going to write about how to draft patterns for stays because there are so many ways to do it so this is simply a tutorial that will show you how to put together a pair of stays relatively quickly. 

My friend is quite small and her old stays were a bit too large so I removed two tabs (one from the original seven tabs on each side). This pair will be laced both from front and back and has got only three panels on each side instead of the usual five panels. Having only six panels altogether is also a way to squeeze time away from the construction. So here's the starting point: The pattern pieces have been pinned to the middle layer of the stays. This layer is sturdy and heavy, tightly woven upholstery cotton. 


First, mark the seam allowances. I'm using 1 cm seam allowance because I'm almost certain these stays will fit right, or they'll need just slight alterations. If you're not that sure about the size and fit of your stays, use wider seam allowances.


Draw the lines by connecting the marks.


And here's a photo with all the seam allowances having been drawn. Notice there are no seam allowances on both center back and front because this is the middle layer of the stays and the raw edges will be covered by the outer layer, that will be folded over the edges to the underside of the stays.


Draw lines around the tabs.


Cut out the pieces, except the parts between the tabs.


Remove the paper pattern pieces.


Don't forget to cut the shoulder straps either!


Now move on to marking the lines for boning channels. Start from marking the ends of the lines to the edges...


...and to the seam allowances...


Poke small holes through the paper in the places where the lines don't meet the edges.


Draw small marks through the holes.


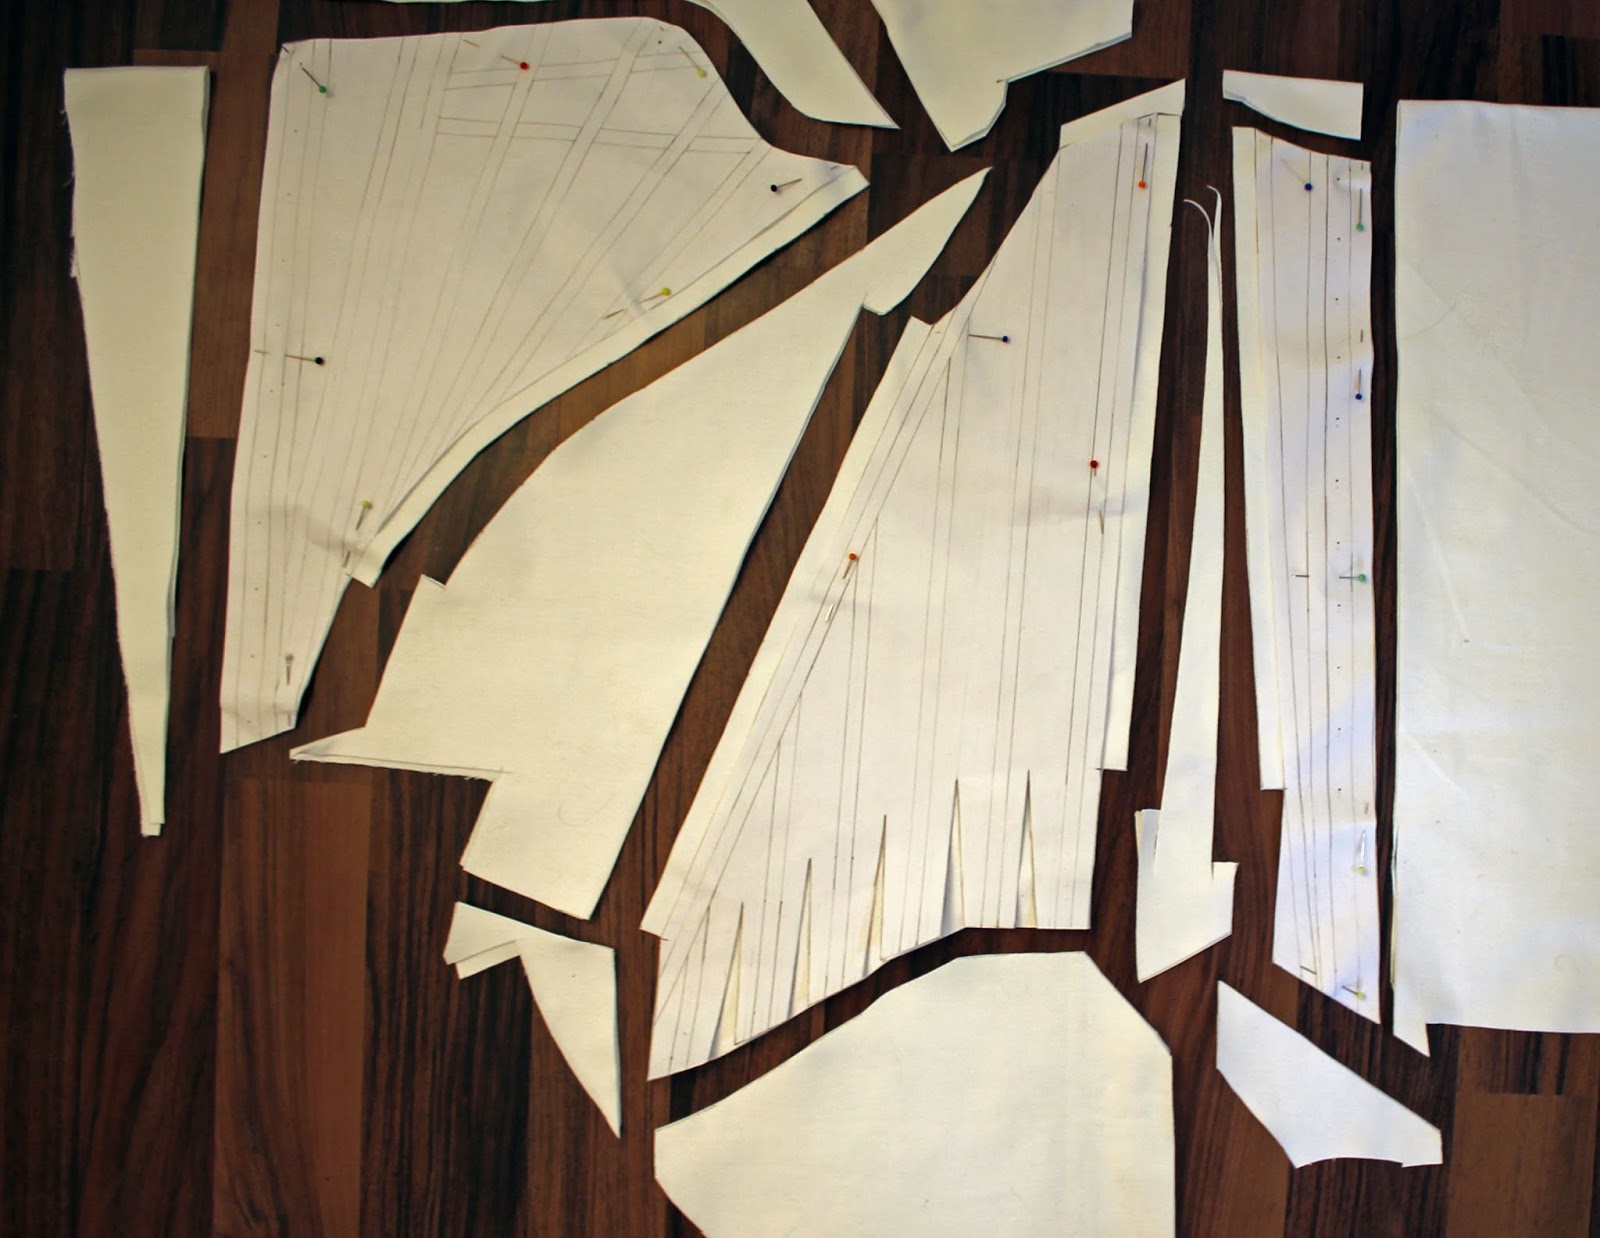
Remove the pattern. This is what you should have.


Now you can easily draw the lines for the boning channels by connecting the marks.


The result...


You can see the lines through the paper so draw the ends of the lines to the other side of the paper so it will be easier to mark them as well. Once you're done drawing the boning channels to all of the middle layer pieces, we're ready to move on to the next part.


Next part of this tutorial will be about cutting the outer layer and sewing the channels.

Thursday, December 12, 2013

Ehrensvärd museum and Christmas ball in Suomenlinna

 I'm a bit late with this post but last week was so full of things to take care of I didn't get it done until now. So here's my report on Christmas ball and the happenings before the ball. Two of my friends (from the same town I live in) and I arrived to Suomenlinna really late on Friday night so we decided to skip the Saturday's first event which was a parade. In stead, we got slowly ready for the day with Merja at the hostel and once we were all dressed up, headed to Ehrensvärd museum to take photos of the gowns in 18th century surroundings.


 The museum brings me memories from the first time my friend Ida (below) and I attended the Christmas ball in 2008. We visited the museum back then and that's why I suggested that we should have a photoshoot there. The museum seemed a bit emptier than last time so my guess is that some of the furniture wasn't there.


We joined with the others at the 18th century market after the photoshoot at the museum. Not many photos were taken at that point of the day since we were all busy checking out the market tables and catching up with everybody. The market was also open for public and people could ask the reenactors about their uniforms and dresses etc.


Around six o'clock in the evening it was time for the spectators to leave so the ball could begin... And here comes a brief costume report... Maija of Couture Mayah wore her cute pet en l'air jacket. 


Merja looked as fabulous as ever in her silver embroidered dress that I had been looking forward to see in person. She also wrote her own post about the event. 


And Ida wore the floral robe à l'Anglaise that I recently revamped for her.


Roosa was our lovely debutante. She lives in the same town as I do and wants to start making 18th century gowns for herself so I might have a sewing companion in the future after all (wow, an actual human being!). Since this was her first ball, she borrowed a chemise dress from Couture Mayah.


A group of lovely ladies had prepared delicious food for us in the kitchen. I was glad to hear they had been able to start early so they could also enjoy the ball and dance.


Several Swedes had traveled all the way from Stockholm for the ball. 


I was happy to meet Elisa and her husband again since the last time we met almost three years ago. She, too, wrote about the ball on her blog.


There were also several kinds of desserts...


Some time after dinner the dancing began. At first, the members of L'Amusette dance group performed for us.


And after that, everyone could join in. 


Dancing at Sveaborg, 1764, Elias Martin.

And of course, as the evening progresses, your hair-do will start falling a bit, especially after dancing. But I like the atmosphere created by the candles in this photo...


Later in the evening, you could also join in to play parlour games. This is musical chairs... without chairs... 


P.S. In case you had noticed, many of the photos on the blog are still missing and I'm slowly uploading them back. At first I didn't remember getting an email about the switch from Picasa to Google+ so upon seeing my photos on Google+ I simply deleted them and didn't realize they would be gone from the blog as well. 

Wednesday, December 4, 2013

Robe à la Française - the first wearing at Christmas ball 2013

I had my doubts, but the robe à la Française got finished just in time for the Christmas ball trip, and with surprisingly little stress about it. Ok, to tell you the truth, I did panic a little on Tuesday (three days before the trip) when I had a problem with the front trim but I forced myself to stay calm and take care of the issue right away. And so the dress was finished a few hours before we had to leave home for the flight. I honestly thought I had a looser schedule than having to finish on the last minute!


So, this post is mainly about the dress and I will write another post about the event itself to avoid having a ridiculously long post on the blog.


Anyhow, as you can tell from the photos, I accessorized the dress with red, white and black to give this outfit some colour so it wouldn't be just plain white. I didn't have time to add the bows I was telling you about in the last post but it doesn't matter because it will be fun to add a little something new to the dress for the next wearing.


There are two pairs of tapes and loops on the inside of the dress so the train can be caught up for outdoors and dancing. 


Unfortunately my muff didn't fit in our bags so I had to leave it at home but I took a photo of it afterwards...


And since you're obviously moving when you're dancing, I also took photos of the hem pulled up later when I was at home.


The trim on the front of the gown was hugely influenced by the MET gown that I already linked to one of the earlier posts about this gown. I'm also considering adding some kind of garlands of flowers - similarly to the original - to the dress before the next wearing. I'm just not that sure if it will be too much decoration...


A little repetition here, in case you missed it earlier:  The bodice is based on a pattern in The Cut of Women's Clothes (1600-1930) by Norah Waugh. (See diagram XX on page 90) As usual, I enlarged the pattern on the computer as and altered it after printing it out. The bodice and the sleeves had to be shortened because I'm quite short and high-waisted (I'm pretty sure all my active readers are tired of hearing that all the time). I also had to add around 2 centimeters on the sides to the bust. Otherwise, it's basically the same. That is, if I remember correctly anymore. It's been a while since the pattern was drafted and fitted.


 Here you can see the lovely stripes.


And the dress seen completely from the front. I'm starting to think I actually prefer the way it looks when it's pulled up because it isn't so boxy like that.


The silk organza trim got officially approved by Leo... I really fell in love with this material. Actually, I liked it so much I'm thinking about using it for the robe à la Polonaise as well. It was so easy to cut and to work with. I barely needed to iron it because it folds easily with your fingers and nails. Leo also loved the box in which the fabric was mailed to us. He keeps sleeping in it so I haven't thrown it away just yet...


A couple of photos of the dress at the ball in the evening...


Special thanks to Ida for taking the photos and PS actions credits go to Bokhelie on DeviantArt.


PS. A few people have asked me if my hem got really dirty during the evening. Well, here's a photo that shows how dirty it got. I spent two days after the trip taking care of the clothes and cleaning the hem took the longest. First, I started by rubbing it with a wet piece of cloth and it worked ok but then it would have taken so much time to clean the whole hem with this technique so I continued the cleaning process by washing the hem in the sink with water and a little laundry detergent. I hang it for a while and after it had dried I noticed there still was some dirt on it so I rubbed the hem again with another wet piece of cloth. Finally after that it was clean enough so you can barely tell it had been dirty at all. It's never going to be completely clean again but I don't care because you kind of have to be mentally prepared for it if you decide to make a white dress with a long train. I could have, of course, lined the hem with another fabric, which would have made washing it much easier but the fabric is already quite thick so I didn't want to do that. 


Stay tuned for more photos of the Christmas ball and other events of the day... Oh, and if you like, I can take more photos of the construction details from the inside of the dress later on, once the batteries of my camera have been fully recharged...