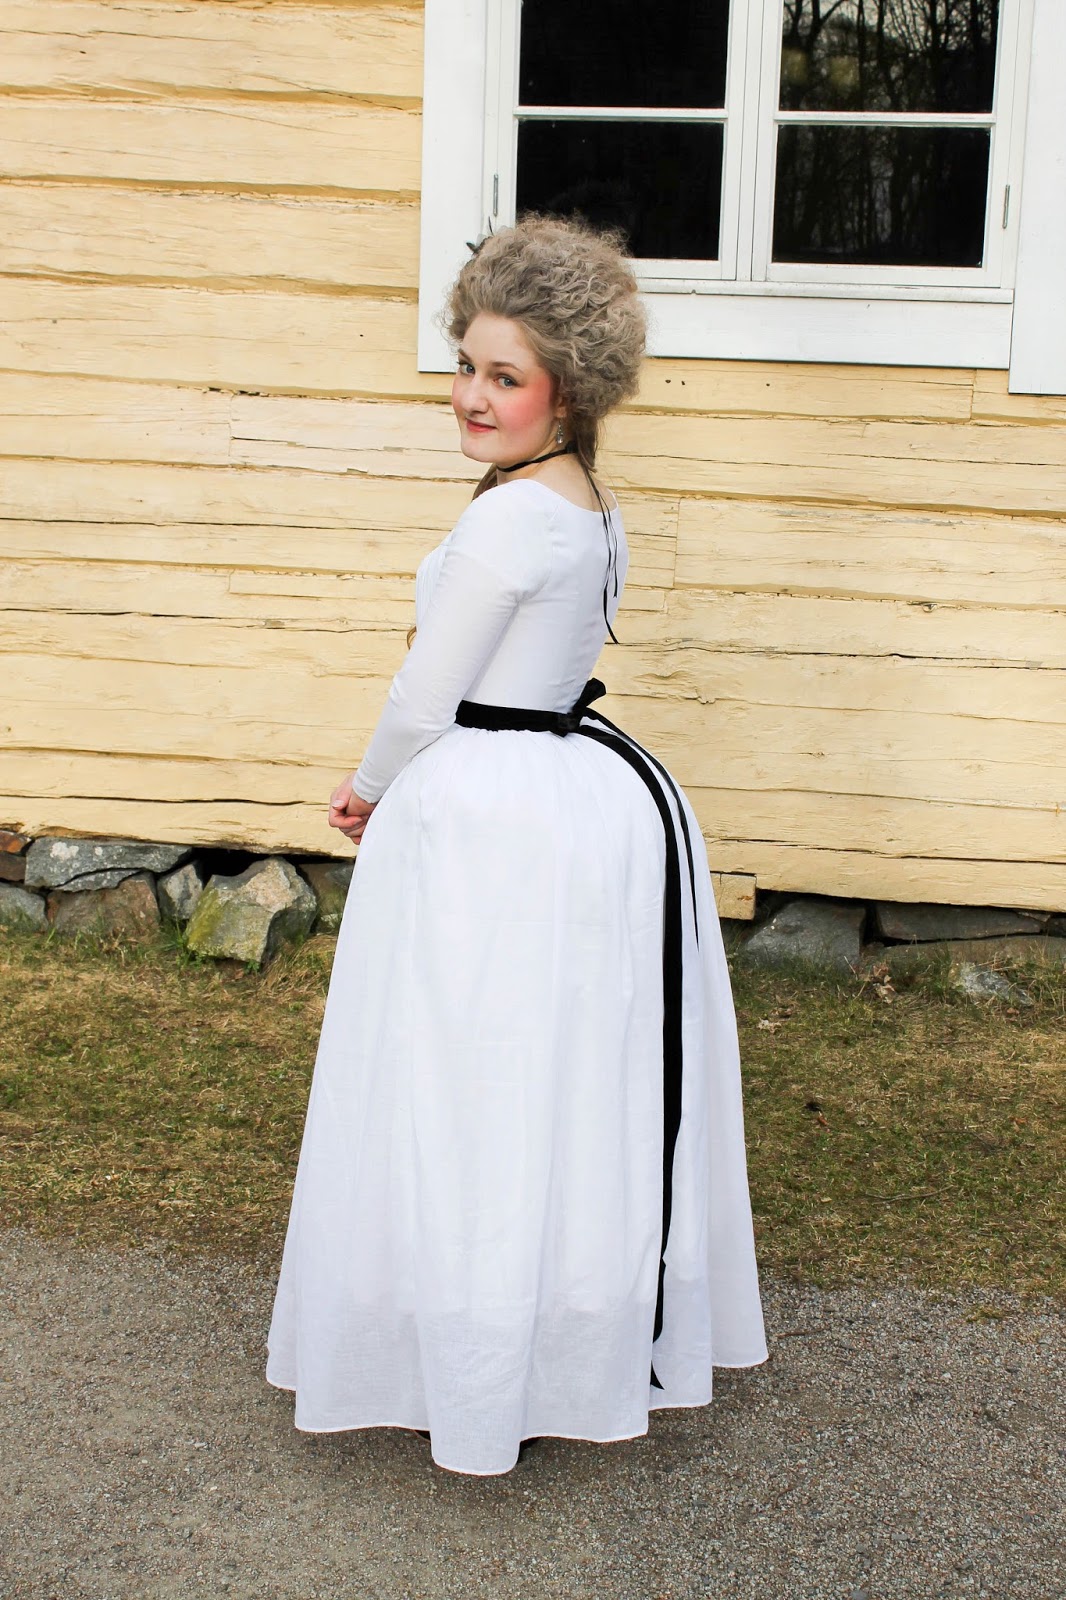
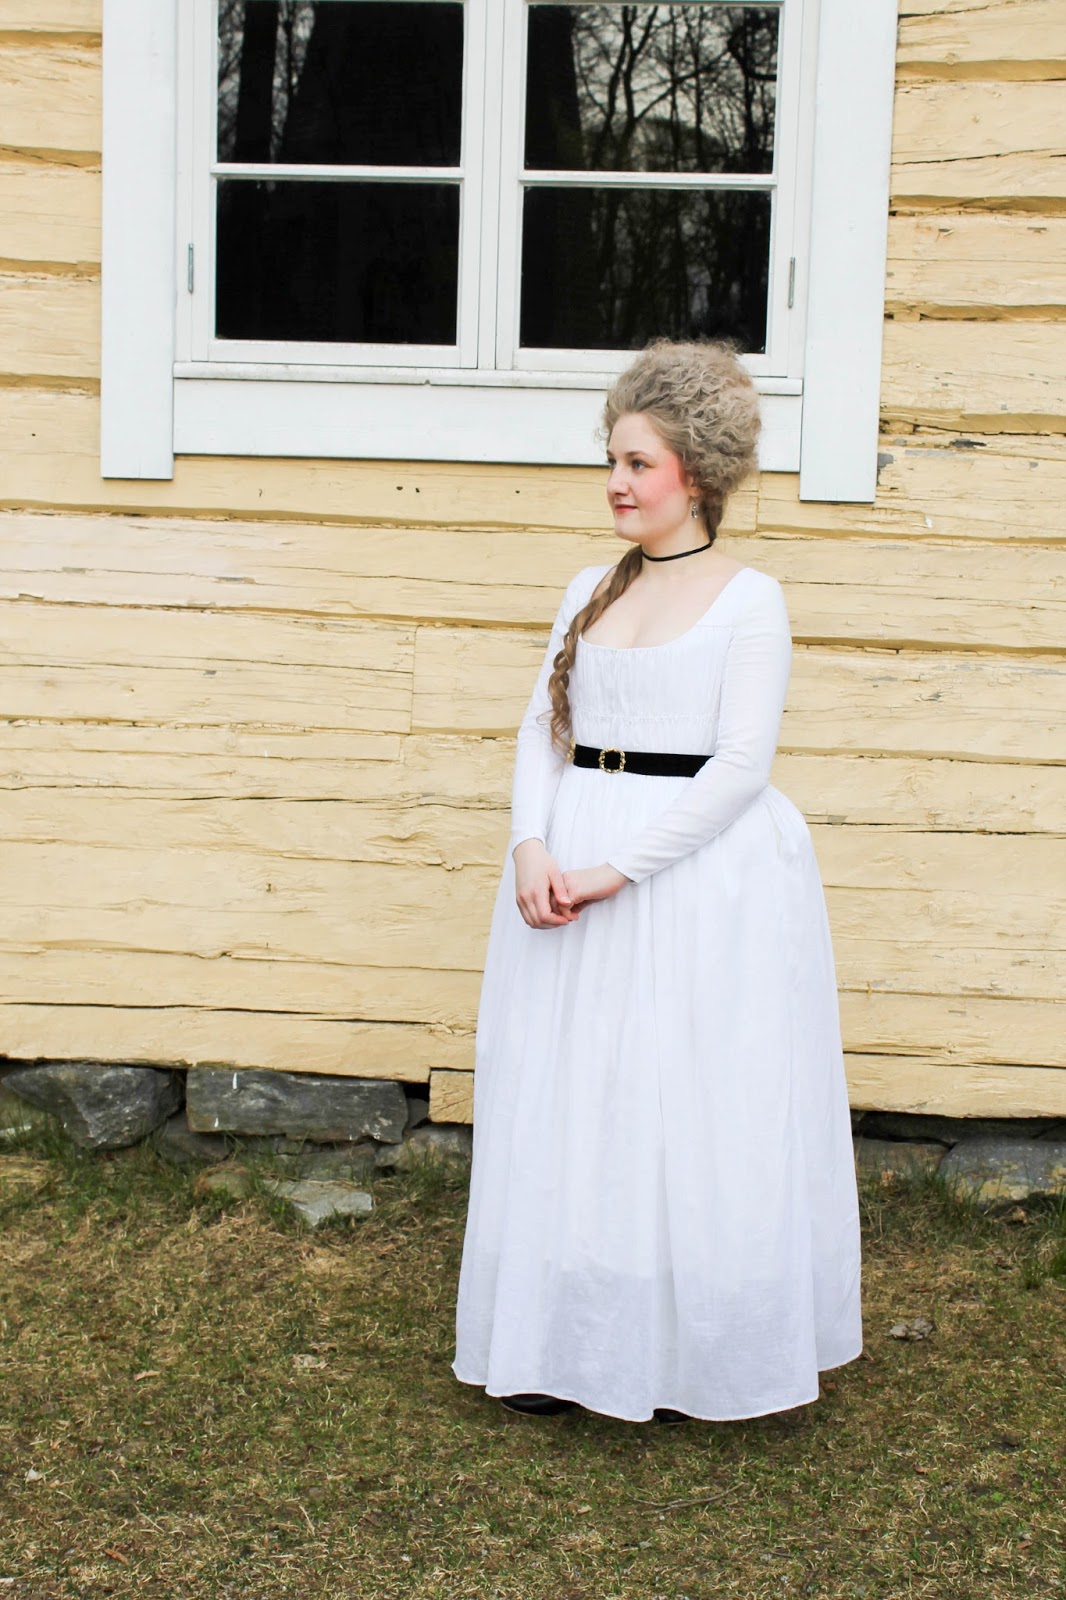
There has been a long silence on the blog this year - but there's a good reason for that. I've had a permanent job since last year, which meant we could finally move out of our small apartment into a new home. Not going into detail but it was quite a long process so it kept me away from blogging over the first half of the year. I'm both relieved and happy to say life is now getting back to normal again. I did manage to make a new dress for a masquerade earlier this year by squeezing some sewing time in in the evenings and mornings here and there but it had to be a very simple dress so I could finish in time. And simple in the 18th century equals a chemise gown, right? :)
However, I did not choose the most simple design for this type of gown, which would of course be the very often recreated chemise gown from The Cut of Women's Clothes by Norah Waugh. I'm not a big fan of the poofy-ness of 1780s chemise gowns so naturally I'm drawn towards the more fitted types of this style so I made my gown with a fitted back and long tight sleeves.
Interestingly, I noticed I could even wear this gown without any stays. Thanks to the heavy lining and the laced closure with bones on either side of it, it kind of works as a light pair of stays (or jumps). I'm not go into the subject of whether it's okay for "a lady" to wear it without stays or not but, having worn the blue floral robe à l'Anglaise to a picnic in sweltering heat a few years back, it definitely feels like a possibility for me, in case I ever go to some outdoor event during the hottest days in the summer again.
Even if the sheer fabric of this gown is lined with a sturdy lining the bodice is slightly see-through so choosing the white 1760s stays instead of my 1780s stays felt like a good idea. But of course that means the gown looks really flat in the front since the 1760s stays create a very straight silhouette and I'm not sure if I like how it looks now. Does that mean I have an excuse to make a new pair of 1780s stays with a white exterior material? Under the stays I'm wearing my short-sleeved shift, and with my 1780s bum pad with two white petticoats on top.
I also wasn't sure if it would be okay to wear the gown over as large a bum pad as mine since the majority of the reference images of chemise gowns that I pinned seemed to be worn without any bum enhancements, which makes sense given how informal style this is. However... Why not to make it look even a tiny bit less simple for a masquerade? I could always wear it without a bum pad next time. For the same reason I accessorized the gown with black to create a more dramatic look. What I'm loving about this gown is that it's quite versatile. I've got lots of ideas how it can be worn it differently to different occasions. More on that when an opportunity to wear this gown appears again. :)
My hedgehog hair-do was the artistry of Mia again. I really think she outdid herself this time! I think she already did such a good job last time she did my hair but this time it was just fabulous :) We even powdered my hair by layering a very light coat of white hair powder on top of a bit more grey.
And below are some sources of inspiration - and more can be found on my Pinterest board, as usual.
First there is a fashion plate from Cabinet des Modes. A very simple, early robe en chemise, tightened by a Belt of wide black velvet.
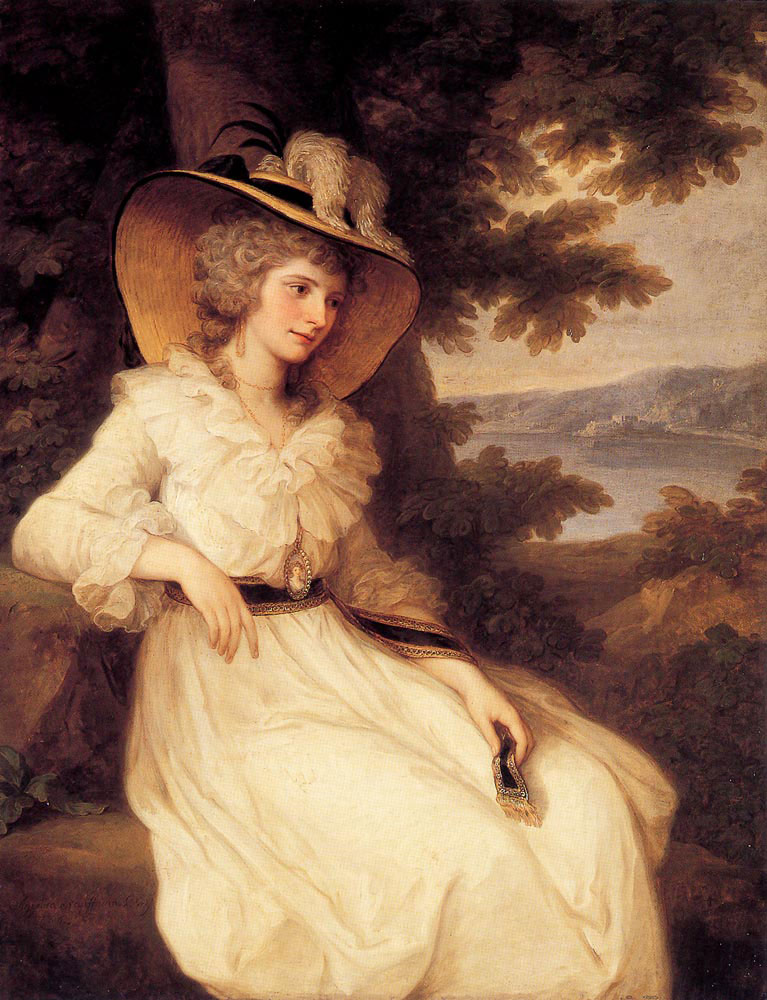
Then we also have the famous paining of Elizabeth Foster, wearing a white chemise gown that is actually very similar to the gown shown in the fashion plate, with a black sash and that straw hat that everybody wants. ;)
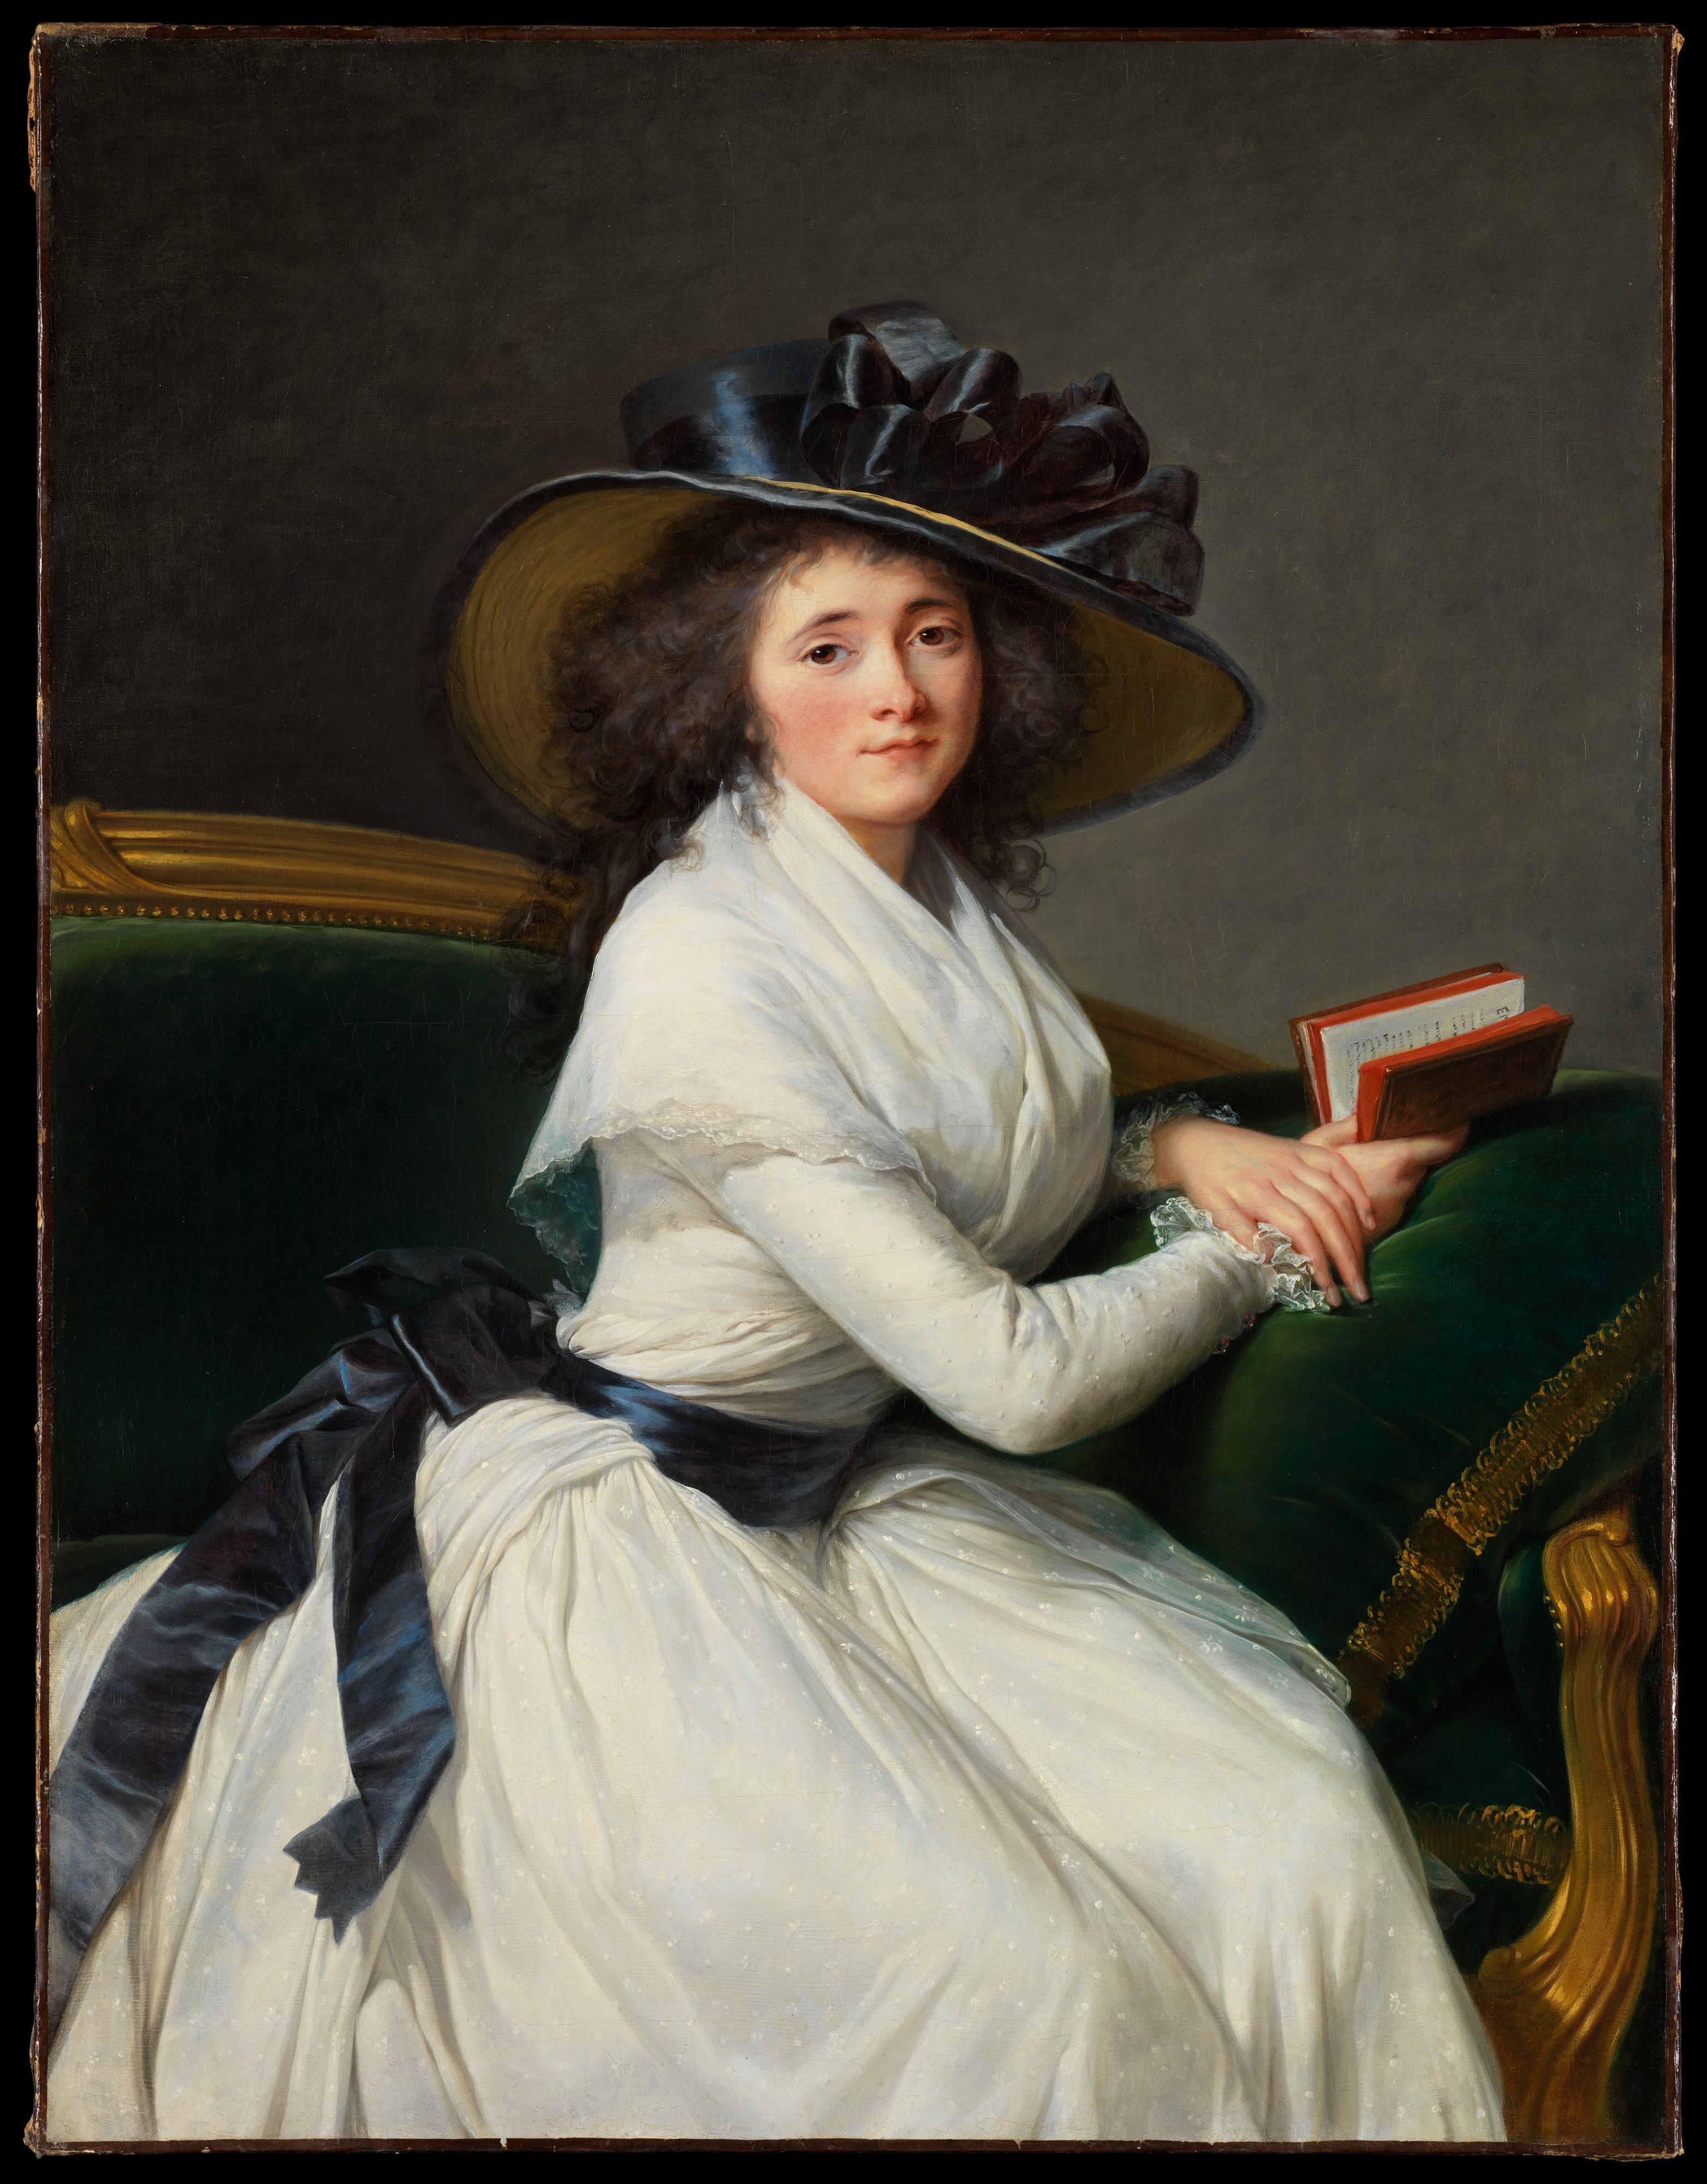
It looks like Comtesse de la Châtre isn't wearing a chemise gown in the painting below, but of course there's the black and white theme going on, along with the long sleeves. And again, we have a lady wearing a straw hat. I'm acutally thinking about making a straw hat like the one Duchesse de La Rochefoucauld is wearing in the image in the link. Notice it's very similar to Comtesse's hat, except with a poofy top, and that the painting is dated to the same year as well.
In Part 2 of this tutorial we got to a point where your stay pieces were joined together. Now it's time to whip stitch the seam allowances down after the fitting session (and doing possible alterations, as in my casereplacing the front panels with wider panels). Shortly after finishing this part of the construction, I learned from 18thcenturystays that you could also double the thread as it's stronger than single thread(so you can do that).
After that, it's time to mark the places for the lacing holes. When I made my first pair of stays this was one of the most puzzling parts for me to figure out and I didn't do it right at first which caused the sides of my stays not to meet evenly at the back. Of course, I hadn't seen Jen of the Festive Attyre's post The zen of the spiral lacing yet so I had to learn this the hard way. Anyhow, I'm just going to take Jen's instuctions a step further and show you how to figure out the places for the lacing holes step by step.
I hope the following makes sense...
First, mark the upper and lowermost holes to the panels, between the two boning channels. The uppermost hole is 1 cm down from the upper edge of your stays at both front and back. If you've got a front lacing, you can mark the lowermost hole 1 cm away from the lower edge at the front as well. However, at the back the lacing doesn't go all the way down because it isn't necessary. There you mark the lowermost hole at the waist line because you don't need lacing below that. That usually means the spot shown in the diagram below (1.).
Next follows the crucial part in getting the sides of your stays to meet evenly at the back. On the left side of your stays, mark a hole 1 cm away from the lowermost hole and, on the right side, mark one 1 cm away from the uppermost hole (2.).
Then it's time to figure out how many lacing holes you want your stays to have on each side of the back. From 48 extant stays with photos of their backs from my Pinterest, the majority had either 10 (9), 12 (11) or 13 (8) holes but the range was from 7 to 15 holes.
From counting the amount of lacing holes of extant stays with front lacing, I got the range from 6 to 10 with the majority at 8 (6 stays from 12 altogether).*
*I didn't take 1780s partial front lacings, stays with stomachers nor very short 1790s stays into count.
Generally, two things have an effect on how many lacing holes you're going to need:
the distance between your waist and bust line (i.e. the length of the front and back panels of your stays), and - how far from each other you're going to place your holes.
Upon my experience, I would say it's best to place your lacing holes approximately 2,5-2,7 cm away from each other. 3 cm or more is pretty far and 2 cm is pretty close so you'll end up having to stitch more lacing holes and requiring a longer lacing string. Plus, more lacing holes means you're going to spend more time lacing yourself into your stays.
Measure the distance between your marked lacing holes as shown in the diagram below (3.) and divide the distance with 10 in case you want to have 12 holes like I did. (with 11 if you want to have 13 holes and so forth...) I got 2,45 cm this time, which was, as explained, a desirable distance between the lacing holes.
The last thing to do is to mark the rest of the lacing holes (4.). ;)
Then it's time to stitch your lacing holes. Of course, if I was more true to the "speedy" theme here, I could use metal eyelets but I tend to prefer hand-stitched lacing holes nowadays simply because a) they look accurate and b) it's actually quite fast to make them with the right materials and tools.
You will need to get an awl to make the holes. Preferably a tapered one, unlike mine.
In case you want larger holes than mine you can also try to gently stretch them. Orjust make your life easier and get that tapered awl. ;)
Using buttonhole thread, whip-stitch around the hole. Please don't attempt to try to use your regular sewing thread! It will just make the process slower and your lacing holes will be less pretty. Been there, done that, unfortunately...
The first lacing hole done!
Then just keep repeating...
...and repeating...
...until you're done. :)
Below you can also watch an eyelet making video by Burnley & Trowbridge.
After finishing the eyelets, move on to cutting the lining from linen. The lining consists out of four pieces + shoulder straps (+ tabs, if you're doing this the proper way) + a small additional piece(s), as to be explained. Preferably, place the seam in the the middle of your stays as seen in the photo in thelink. I cut the lining by using the pattern for the stays but you could also simply layyour stays on the linen and cut around the edges and trim the edges as you go (that's easier and faster if your making an earlier type of stays that lays flat on the floor since it's quite straight without the swooping bust shaping of the 1780s as here). Notice that it's best that you don't cut the parts between the tabs yet, just like earlier.
After cutting the lining pieces, start by pinning your front piece to your stays with the seam allowances turned under and the edges left raw. As you can see from the photo, I already stitched the upper edge of the lining to the stays by machine.
Then stitch the piece around the rest of the edges and whip stitch the turned-under seam allowances to the stays by hand. After the front piece is added, pin the back piece of the lining and repeat the same process as with the front piece. Notice it might be easier for you to to stitch around the tabs by hand with long stitches than with the machine.
Then cut a small piece for the part where the panels of the stays overlap and that you therefore couldn't cut as one with the lining piece. Also, add the lining to the straps. You can easily stitch it around the edges with the machine again. It looks I forgot to take a photo of this part of the construction but it's straightforward enough for you to do without. :)
Then we move on to the last bit that almost everybody says they hate the most when making stays because stays have tabs and they're tricky and binding them makes your fingers sore. I've previously shared some tips about the binding on the blog but I'm not going to assumeyou've read them or that you still remember them... so here we go with some tips to make the binding easier for you.
First and foremost, do not attempt to try to use a wide binding tape. The wider, the worse it gets. If you're using precut bias tape, it should be the narrowest kind available (which, I believe, is the 1 cm width). It's going to take quite a bit of skill and patience to get the 1,5 cm wide bias tape beautifully bound around the edges of your stays so spare yourself and don't try to do it. Again, been there, done that. A wider type of binding material simply doesn't end up looking as good as a narrower binding. If you already haven't, take a look at extant 18th century stays and you will notice that the bindings on them are quite narrow and that is for a reason. Anyone who has been making 18th century costumes for a while, has probably also learned that bias tape isn't accurate either (I recommend getting Costume Close-Up by Linda Baumgarten for more information on this).
At the moment my favorite binding material is 7 mm wide twill tape because it's stretchy so it's easy to get smoothly and beautifully bound around the edges. I also like to start stitching the binding from the inside of the stays because that way you have more control over your binding material later when your binding is already intact on the inside. Plus, you can use more generous and faster stitches on the inside of your stays so you can spare the tiny, beautiful stitches for the outside.
I would advise to stitch the binding completely by hand because it's just much more manageable by hand than by machine - especially if you're a beginner and it's hard for you to stitch very precise parts by machine.
Thirdly, I think the square types of tabs are easier to bind than the rounded ones because you can simply fold the binding at the corners of your square tabs instead of having to gather the binding slightly to get past the round parts smoothly. But I believe this is just a personal preference so you might feel like the rounded tabs are just as easy. However, it seems the rounded tabs are more popular among people who have made 18th century stays simply because popular sewing pattern and guidebooks such as Corsets and Crinolines and Period Costume for Stage and Screenfeature them, regardless of the fact on extant stays the square or squarish types of tabs seem to be more common.
For comparison, below is an image with some tabs and bindings that I've used previously. The first is 1 cm wide cotton bias tape on the squarish tabs of my brown KCI stays. While it looks good, it kind of looks a bit off. The binding has definitely started to bug me since this pair of stays took probably the longest for me to make and yet they don't look as perfect as they could. I think it's mainly caused by the binding. It's simply too wide for 18th century, even if the visible part is only 5mm. The second photo on the left shows round tabs with the same material and width so the same problem applies to them. Notice the gathering on the round parts. On the third photo on the upper right we have the same binding material and width again but the tabs are square tabs so the binding is folded over the corners. The last, below right photo shows a pair of stays that I made before any of the other stays seen here, with 1,5 cm polyester satin bias tape. I think that's actually pretty decent work considering how I hadn't been sewing for a very long time at this point yet, but it's definitely a bit uglier than the other bindings. Round tabs + polyester satin + 1,5 cm width isn't an accurate looking combination at all.
And below you can see how much better the narrow binding looks!
And then there's the one last thing to do: adding the lacing holes for the ribbons that hold the shoulder straps and front panels in place.
After that... Congratulations, you're done! :) I hope this tutorial was helpful!
I don't know if you still remember but earlier I mentioned an outfit that I couldn't finish on time for the Isokyrö event in August. Well, now it's done, but I only finished it a couple of days ago - so it was more than three months late for the original deadline. The dress would propably still be unfinished by now if I hadn't set a new deadline for it for this year's Christmas ball. Originally I had planned to wear the same dress as last year and make the naval riding habit for a parade preceding the ball but obviously it didn't happen as I'm behind on pretty much everything regarding to sewing (and blogging, too...). Alright, on to the new dress!
For the bodice and sleeves I used a robe à l'Anglaise pattern from The Cut of Women's Clothes by Norah Waugh (see diagram XXII). Working the same way as I always do, I enlarged the scale pattern on the computer and printed it out. However, this pattern turned not to work easily for me and the fact that I had to make quite a few mock-ups with so many alterations delayed the completion of this gown. Also, it didn't help that the fabric stretched a bit more than I had imagined and the stretch of the mock-up fabric was also different... I swear I've never had so much trouble fitting sleeves as with this dress (I guess I only now truly understand the meaning of sleevils ;) ). Not having made sleeves like this earlier I wasn't even sure how they were supposed fit/look but I think they turned out to be alright in the end.
To upgrade the look of a brown day gown into a dress suitable for a ball I added some red accessories, using the same ear rings as last year and the belt that I have worn with pretty much every fitted back gown that I have.
I also intended to make a matching petticoat from the same fabric for this dress but decided to use a sheer white petticoat this time to further enhance the evening gown look and leave the self fabric petticoat for day wear occasions. I'm probably going to wear this dress at the 18th century fair of Isokyrö next year so the brown color of the matching petticoat should be much better for outdoors than the delicate white. The skirt of the dress will also be draped up to avoid the slight train from dragging in ground.
The dress has a tight fitting quarter back but the floral pattern of the fabric conceals the seamlines so you can't see much of them here. I'm actually really happy with the fit of the back since the back of this gown fits more smoothly than the back of my earlier quarter back gown that had wrinkles all over it. There's also a slight train but I made a cutting mistake and it ended up being shorter than I had intented. Looking at the photos, I notice that the train isn't even either - it is longer at the sides of the center back than in the very center. But right now I don't care. Especially because I want to make a divided bum pad like Aubry of A Fractured Fairytale did or at least a bum pad with a dip at the center back, which should fix that problem.
My hairdo was created by Mia, a new friend who traveled with me to the ball for her first time. I feel so lucky that I now have a friend who understands sewing and lives permanently in my hometown! Meeting her has been one of the best things in the past few months and the fact that I met her through my blog helped me to get over my blogging anxieties that have partly kept me away from posting for a while. It reminded me again that there are quite a few lovely people that I might have never met if I didn't have this blog...
All of these photos are also taken by Mia, at the Ehrensvärd museum that you might have already recognized from last year's Christmas ball posts. For some reason (read: because we were too busy doing last minute sewing) we forgot to check the museum opening hours and the museum was just closing as we arrived there. But the museum guide was kind enough to let us take a few photos before leaving. :)
Here's Augustin Ehrensvärd himself up in the middle with Noora and I posing next to him.
This post is coming really, really late but at least I'm trying to catch up on blogging because I've been gone for too long. Instead of writing about all aspects of this lovely weekend in August I'm simply going to give you a short tour around our little booth at the 18th century fair of Isokyrö since - apart from meeting friends from far - it was the focus of my trip.
Here's Hanna preparing for the weekend at our booth on Friday after arriving in Isokyrö. As you will be able to tell from my photos, we had all sorts of historical and contemporary fashion items for sale.
Noora arranging her things on Saturday...
A couple of bum pads were hung from the ceiling. ;)
Noora had also made some cute garters and mitts for sale.
You could also buy L'Amusette's calendar for 2015 at the booth. It has got breathtakingly amazing photos inspired by some famous 18th century paintings.
More people from our booth group: Emilia and Ida.
Our booth sign, made by Maija and Hanna. Isn't it just adorable? :)
Here's one portion of the market place on Friday. Also, you could see glimpses of the Old Church of Isokyrö in my last post and here it is again in the background.
And then the same place again on Saturday (photo taken looking from the church towards the opposite direction than the photo above)...
The church made a wonderful background for photos so of course we took many pictures in front of it. Here's a favorite.
On Sunday Noora lent her jacket to me. (You can't go to a church mass in your underwear, right?!) We had not realized that we were almost the same size until this... so at the moment I'm borrowing her pattern for this jacket as I had been planning to make one as well.
In case you want to read more about this event (and see more photos) head over to The Shadow of My Hand.