Showing posts with label Underwear. Show all posts

Thursday, March 18, 2021

Making 18th century stays for a curvy plus size woman*: Green linen 1780s stays, drafted according to Patterns of Fashion volume 5

My friend Pia (@stepsbackintothepast on Instagram) was in need of a well fitting pair of 18th century stays so I started making her one in the summer of 2019. The new Patterns of Fashion book (volume 5) had just come out earlier in the year so I was eager to try out the drafting method introduced in the book to see if it would yield better results than my own. And I was not disappointed! There's one thing I'd like to mention though. The instructions are easy to use for someone with a lot of experience in drafting patterns but I think beginners might find them lacking, as there are gaps that you should be able to fill in. I mention this because I don't want anyone to excitedly get the book and be sorely disappointed that they aren't able to understand the method and get the results they were hoping for because the instructions are very vague. Other than this, I think the book is extremely interesting and provides a lot of useful information that you can apply into making a pair of 18th century stays, whether you are a beginner or a more experienced historical costume-maker. Sadly, I didn't take many in progress photos of the stays in the making as I was trying to get them ready for wearing as quickly as possible. The first photo shows the finished stays (more of those can be found below the construction photos) so you can already see how they turned out.

Disclaimer: This is going to be a long post. :)


The idea was to make the stays as comfortable as possible, so we decided that we should use linen that we had already had available in the stash, too. The three linen layers are; a sturdy linen canvas for the middle layer, natural linen for the innermost layer and plain green linen for the outside. Here are the panels after cutting. The construction photos were quickly snapped on my not-so-new phone so the quality isn't ideal but I hope they're good enough.


The next two photos show basting around the panels in progress. Later on I realized it would have been smart to baste the middle sections with large basting stitches as well because linen has a tendency to move around when you're stitching the channels but it wasn't a huge problem. 


By this time I had learned that by using a thicker thread than your regular sewing thread, the stitching looks more like that seen on originals and it also creates sturdier boning channels so I wanted to experiment with that for fun, regardless of that the stays weren't even supposed to be constructed in a period manner.


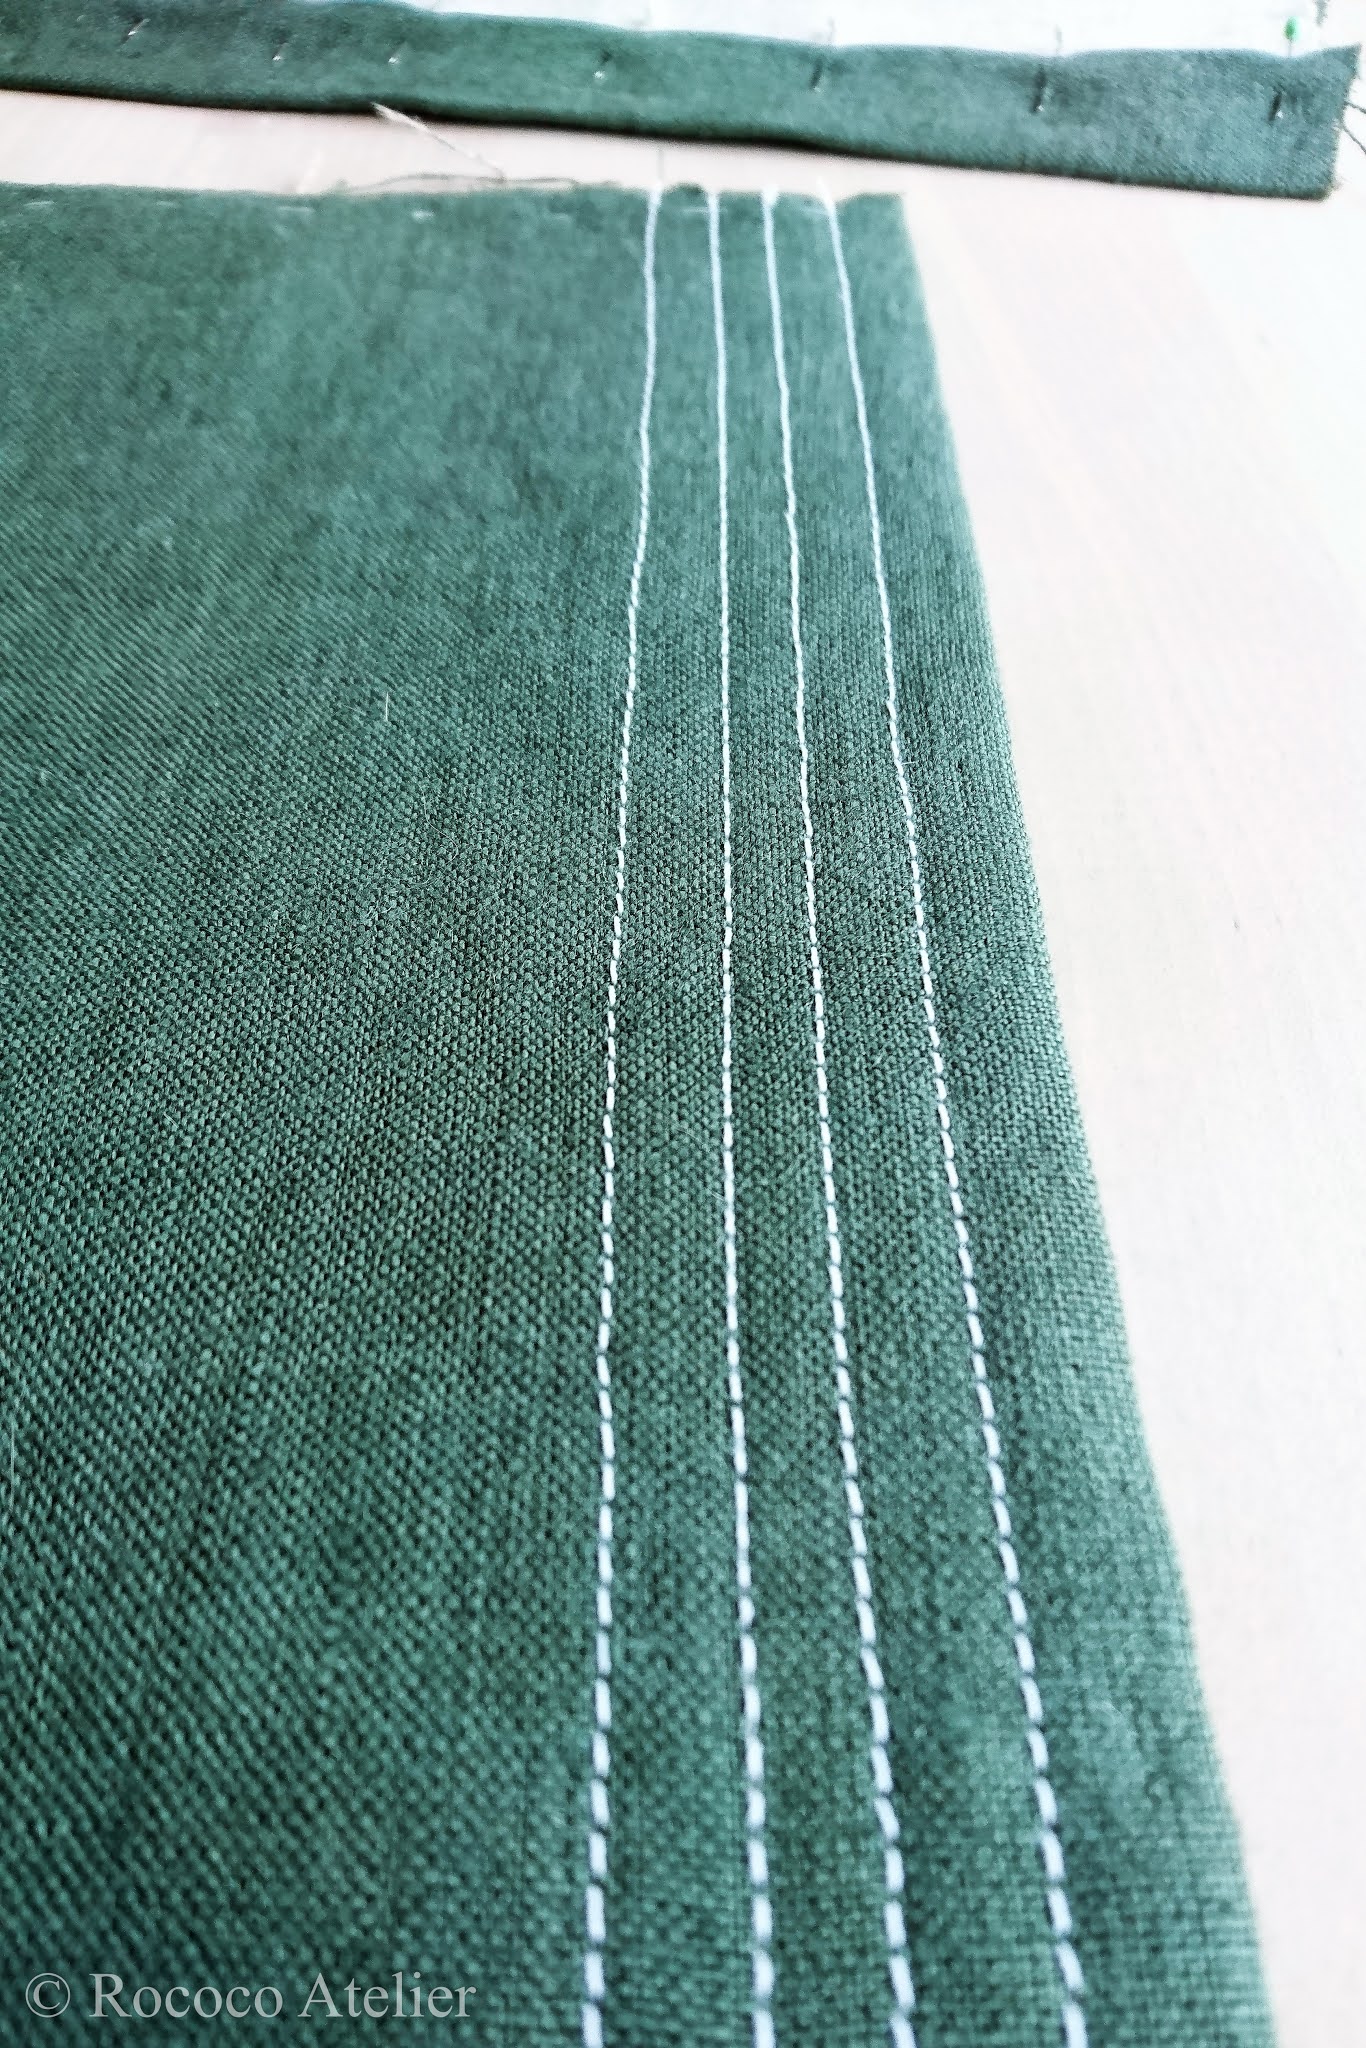
This is how the panels looked after stitching most of the channels by machine. 


After adding the lacing grommets (this is custom work done as quickly as possible so handstitched eyelets weren't an option), assembling the stays and inserting the uncut zip ties into the boning channels it was time for the first fitting! I didn't bother to do a mockup because I was feeling pretty confident about the pattern and wanted to save time so I wasn't going to be as perfectionistic as I normally have a tendency to be. The main goal, afterall, was to make a pair of stays that create the correct shape/silhouette for the era under a gown - nitpicking about every little minor detail was absolutely unnecessary. 

As can be seen from the photos, the front panels were too large at the bust as I had overestimated how much room for the bust was going to be needed. Sorry about the mess in the background and the low quality of these photos. The lighting was less than ideal. The pin at the side marks the place above which the front panels had to mostly be taken in at the side, though the side seams was altered even below that point so that the seam line would be smooth and correspond with 1780s stay front panel shapes as closely as possible. 


See how much extra space there was... 


Unfortunately I don't remember how much I ended up taking the sides of the front panels in but it was somewhere around 3 cm per side if I'm not entirely mistaken. 


The back fitted like a glove though. As a side note, it still baffles me that I sometimes manage to lace stays incorrectly after more than a decade of making and wearing them... Anyway, it didn't really matter at this point. Also, notice that the stays were intentionally made to close entirely in the back, as per Patterns of Fashion 5. 


The following photos are taken from the second fitting. Check out how much better the fit at the bust is! The stays merely hold and support the bust but they aren't supposed to compress nor to shovel the bust upwards too much. She does have a busty figure so it may appear like there's a lot of lift from the photos, also thanks to the angle and lighting.

At the top edge of the front panel of the stays near the armpit you can see how the front panels do not compress - there's still a slight bit of extra there. This point would get correctly, gently pressed against the side of the bust once the shoulder straps would be added, as can be observed from later photos of the finished stays. 


This time I remembered how to lace properly. 😅


At the back we can also observe how the stays merely hold and support the back without compression. There is no "muffin top spillage" of flesh that would be a result of a too tight fit around the bust/back - which can happen to a woman of any size - just to point out that I'm not only taking about plus sizes here. Most of us (unless you're very lean) have more or less flesh that can be moved around and I, too, have certainly experienced spillage after gaining weight, resulting in my old stays becoming too small. It's normal if your weight and/or bust size tends to fluctuate, however, it should be avoided when you're fitting a brand new pair of stays.


After the fitting I closed the ends of the boning channels and zig-zagged around the edges of the stays to imitate the whipped edges of the originals and to prevent the layers of linen from fraying. After this the stays were wearable so they had to be put aside to wait for a better time for me to finish them. It took until summer 2020 for that time to arrive, which is when I bound the edges of the stays with tape, and finally right after Christmas I added the straps and hooks that the straps attach to. 


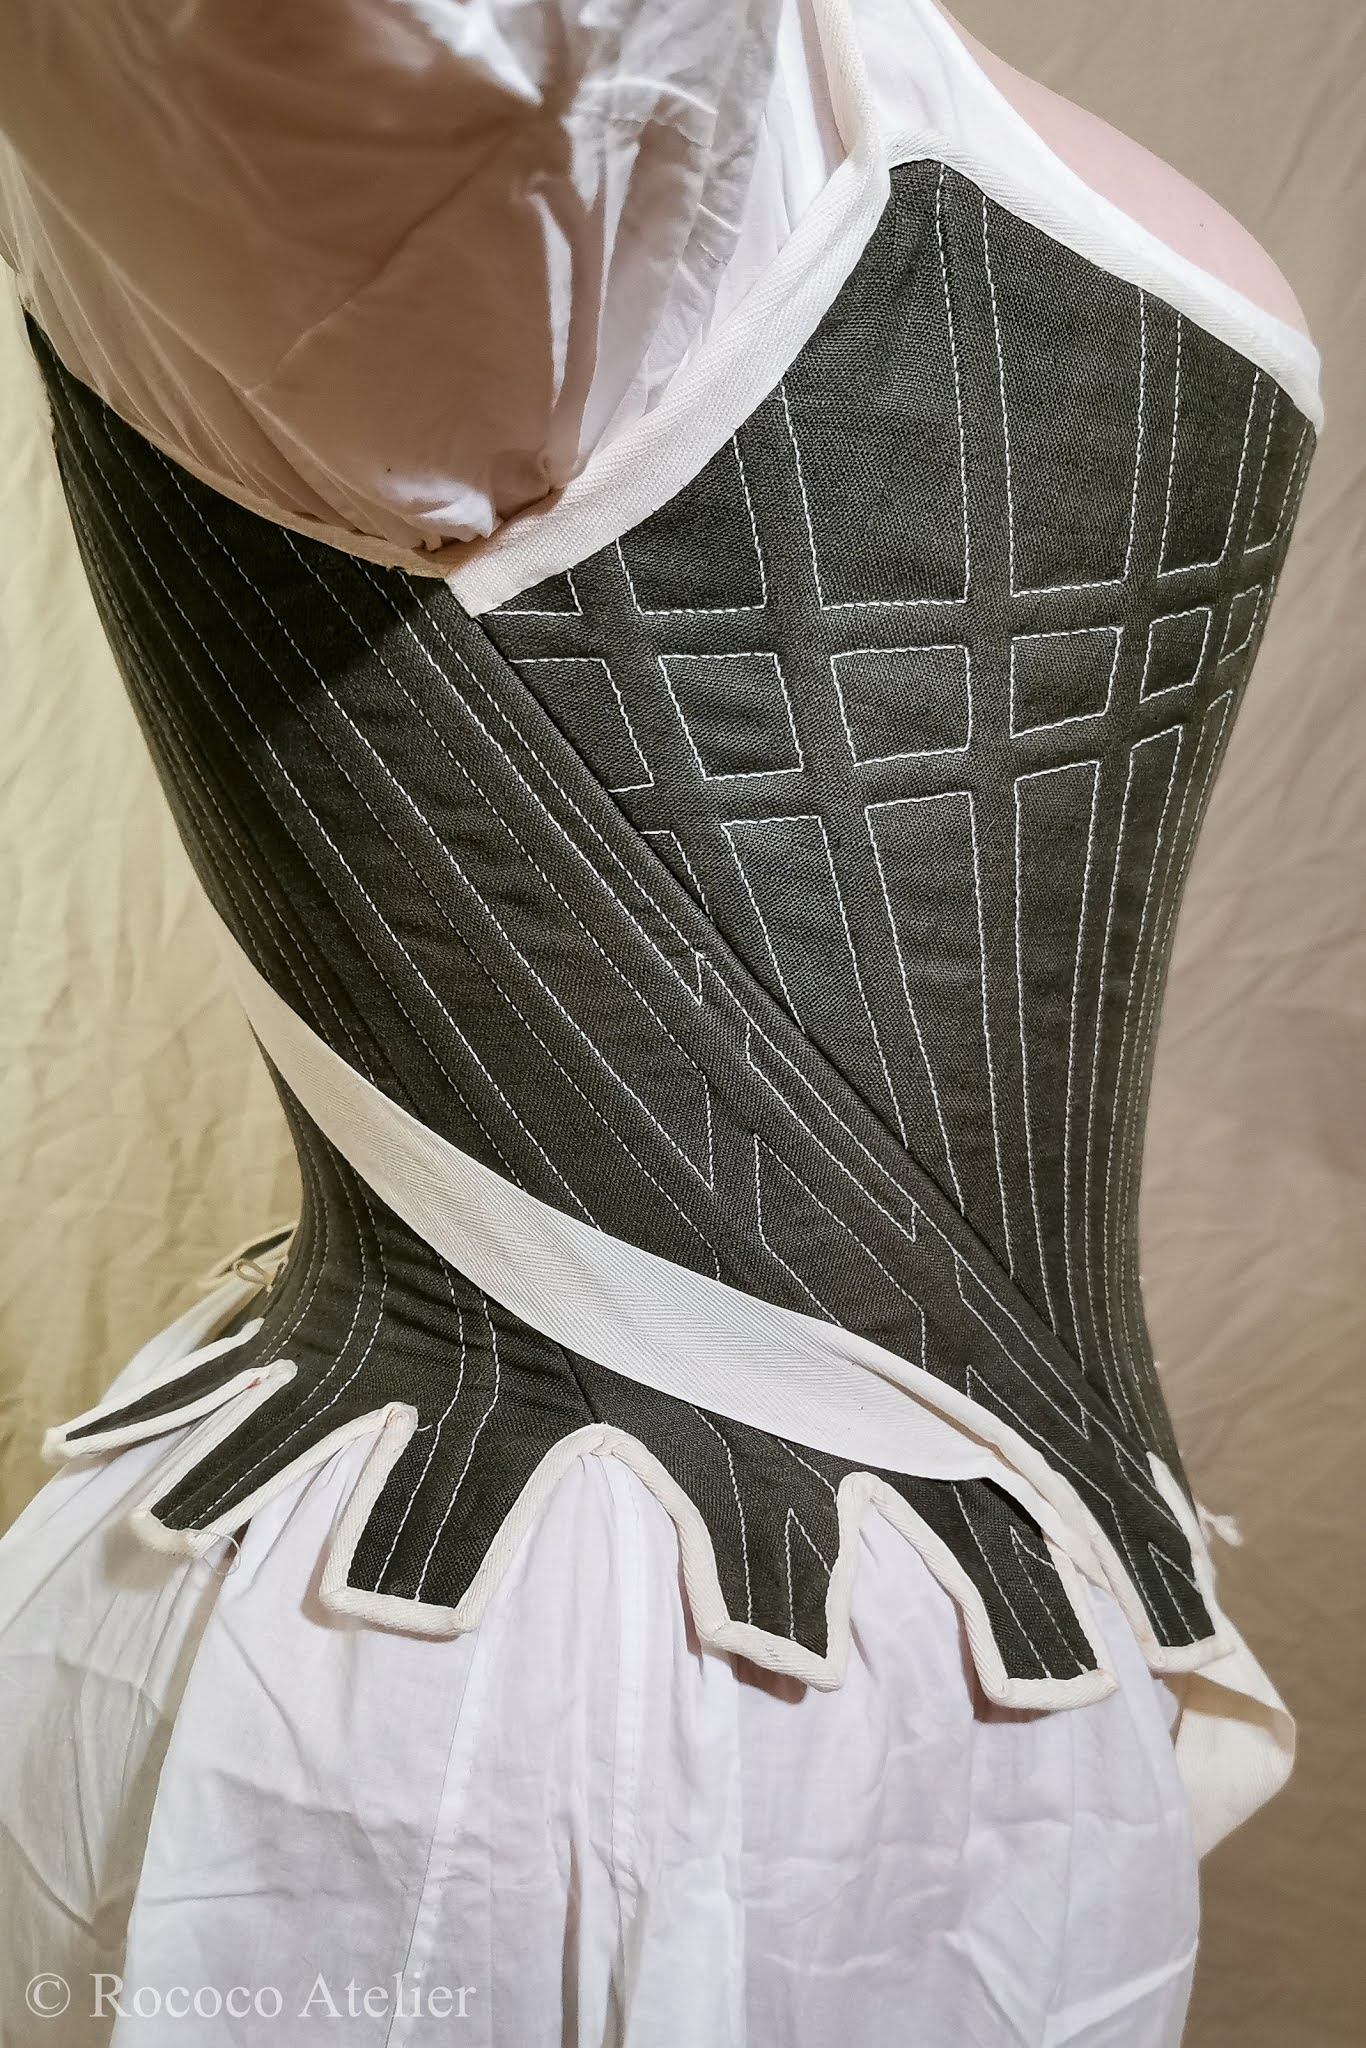
The stays are mainly boned with 7 mm wide zip ties for more support than the thinner (4,7 mm) ones. We were planning on putting metal bones in the channels next to the center front and center back but it didn't happen. We'll see if we find them necessary to add in the long run as the stays will be worn more regularly and for longer periods of time. 

Let's address the shape of the stays. Even though I was basing the stays off of 1780s stays we wanted them to work for a slightly longer stretch of time, at least as far back as the 1770s. Hence the top edge of the stays doesn't scoop down as much in the front as it might, nor is there as much shaping in the front overall. The front curve seen from the side isn't as radical as in some 1780s stays but there is still a little bit of that "pigeon breast/prow front" (or whatever you prefer to call it) look but it's not dramatic. If more curvature for the bust is desired for a more distinct 1780s look, the lacing can be left more open at the front. 


The stays below were one of the examples of stays that I looked at as a reference,  although I wasn't going to copy them or any other specific pair of extant stays exactly, instead Pia's stays are a mixture of typical stays from the decade. Just look how much lower the top front edge of these c. 1785-1790 stays scoops down. 


Pia's measurements* with the stays are 107 cm (42 in) bust and 83,50 cm (33 in) waist, while her natural measurements are 108 cm (42 1/2 in) bust and 92 cm (36 in) waist, meaning the waist reduction is 8,5 cm (3 inches). The bust isn't meant to be reduced in stays so it's pretty much the same. The pattern itself measures 77 cm (30 1/2 in) at the waist and 104 cm (41 in) at the bust. This is something I've learned along the way;  if you draft your pattern to match your desired measurements exactly, your stays will most likely end up being too big, especially if they are made fully in linen, as linen tends to stretch. But I've made stays from all sorts of materials and I've always had to make the measurements of the pattern smaller than your desired measurements. I'd love to provide you with some exact numbers of how much smaller your pattern should be, but that varies depending on the body of the person the stays are being made for as well as the fabrics you're working with and the amount stiffening you're going to put into the stays. But I thought I'd mention this, as a lot of people make the first mock-up of their first stays way too big (including myself) because of underestimating how much smaller the pattern should be in relation to your measurements. After all, that's what mock-ups are for... Anyhow, I hope this helps you to achieve a better first mock-up. Don't be afraid to make the pattern a bit smaller than you think! It rarely is the case that the first one turns out too small. :)

(Inches are rounded up or down to the nearest half an inch.)

*Please note that these measurement may or may not be labeled as plus size depending on country, clothing brand or other factors. However, we decided to use the term "curvy plus size" in the title and text because Pia herself thought it would describe her body the best due to her proportions, as she is short and busty.  

I also made this collage to show the difference that wearing a pair of stays makes. Notice her blouse is somewhat loose at the waist so the photos don't give an entirely realistic image of her body but you should be able to get an idea anyhow. 


Now, as for the arc method drafting instructions in Patterns of Fashion 5 book, the pattern is drawn on a curve. My main issue with it is, however, that the angles of the bust, waist and top hip curve angles are drawn more or less randomly by estimating. This is a problem especially for people like both my friend and myself who have a sway back, which means getting the waist curve exactly right is crucial for the comfort of the stays. A long time ago, when I made my first stays I was unaware of my sway back so the waistline of my first stays turned out to be too low in the back causing pain the lower back where the stays pressed uncomfortably into the back. I've since learned to raise the waist at the back of all of my patterns. For resolving this issue, I recommend you take a look at Mariah Pattie's simple pattern drafting video and/or Sidney Eileen's basic conical block drafting tutorial to compensate for where the PoF5 falls short.  In the side view photo above the collage you can see how much higher the waist is at the back. Below is the final pattern. Notice the side of the front panel might be much more curved if a more pronounced 1780s shape was desired. 


Since these stays are drafted to extend below the natural waist, it's important that enough space is allowed for the high hip in the pattern (this, naturally applies to everyone, not just someone with a sway back).


I've wanted to try out the shoulder straps that cross at the back at least ever since Sarah posted pictures of such here. Finally did! It only took me years... Anyway, I think I may have to move the loops they are attached through slightly more towards the back. As can be seen from the photos, the straps go around the shoulders very far out on the shoulder line and I fear they may slip down on the arms. Pia has sloping shoulders so that makes it even more likely. However, the last time the stays got worn to an event, no slipping happened so we might just leave them as they are so we can be sure they also don't show from the wider necklines of the gowns. Time will tell. 


Another photo of the McCord Museum stays for comparison. 


Had I been more perfectionistic about the stays or if I were to make another pair of stays from the same pattern for her, I would probably fix a few minor things about them, mainly, I think the top edge might ideally come up slightly higher in the back, for example. I was afraid of making them too high so they'd show from the back of gowns and that's probably why I ended up making it a bit too low. But none of that or other minor faults makes any major difference to the basic function of the stays and the shape they give. 


The stays can be laced at the back or the front depending whether there's help available for getting dressed or not. I didn't bother with any of the extra reinforcements for the stomach or other parts - the busk will do just enough for keeping the peak (the lower part of the front panels) of the stays down. 


Some close-ups of the details... 


The photo below shows one of the two hooks the straps attach to.


Another thing one might nitpick about... the boning channels ought to be ever so slightly thinner. That would provide more sturdiness as well as prevent the channels/stitching lines from twisting as much as they do now. Cutting the bones for the channels longer so that the panels would stay taut might help with the wrinkling of the fabric, however, it is also something that tends to happen when stays are entirely made out of linen without so much stiffening. 


The straps are sewn to the underarms of the front panels, conveniently providing more protection for an area that is one of the first places where the stays will quickly start to show wear. 


I managed to stitch the binding at the top on entirely by the machine but the lower edge proved to be too difficult a challenge for me so I quickly basted the binding down by hand at first and then secured it into place with the machine. It worked out nicely; it was still faster than doing it entirely by hand, while ensuring a neatly bound edge at the same time. 


We also took this video of the stays so you can see them in 360°. 


And the stays make an appearance on a getting dressed video we did last summer, too.


I hope you find the post helpful! If you made it this far, let me know! :) 

Tuesday, June 14, 2016

1880s/1890s corset from Atelier Sylphe pattern

A couple of years ago I made a short foray from 18th century costume making into Victorian corset making. While I love the result, the corset unfortunately turned out a bit too large so I never got around posting about it or making anything else from this period. However, a while back one of my friends allowed me to take photos of the corset while she tried it on so I finally get to show it to you.


The pattern for this corset is the "ref P" style from Atelier Sylphe. I made only a couple of alterations to the pattern by taking it in at the waist and hips but as it turned out I didn't take it in enough at the waist.


The corset is made out of two layers, one in white heavy weight cotton and the other in blue cotton twill. Would have loved to make this out of blue silk satin, like my favorite extant corset from this period (from The Corset: Fashioning the Body exhibit), but I wasn't able to buy that locally so it didn't happen. I knew the corset might not fit, as I didn't make a mock-up, so I was entirely happy with this less expensive material. The boning materials include flat steel and large cable ties. 


The flossing in the front was inspired by this corset from the Kyoto Costume Institute.


I'm definitely going to make another version of this corset sometime in the future since it's such a nice pattern and I want a gown from this period as well, but I don't see that happening anytime soon. Next time I probably wont do contrasting stitching, though, as all less than perfect stitching will be less obvious that way! ;) Also, I really want to use spiral steel as boning material next time since I believe it would accommodate the curves of the corset better than the flat steel that doesn't cup the breasts in a rounded way but sort of flattens and pushes them up here, if you can understand what I mean. 

Saturday, March 5, 2016

Tutorial stays - photos

I know, I know. Showing a pair of stays on a mannequin isn't as ideal as showing them on a body but I thought these photos would be better than no photos at all. 


You can see shoulders of the mannequin are too small for the stays and so is the bust too low but you can still get an idea of the shape these stays create. For comparison, the pattern for these stays was modified from the same pattern as my first 1780s stays so the shape pretty similar to them.


The boning pattern is a mixture from three extant stays. Unfortunately, I could no longer find the link to the stays that the front panels were based on but the side panels were inspired by this pair of stays and the back by this


I don't think I have much else to say. After all, the construction was already shown in the tutorial. ;) 

Thursday, May 21, 2015

18th century stays - tutorial - part 3

In Part 2 of this tutorial we got to a point where your stay pieces were joined together. Now it's time to whip stitch the seam allowances down after the fitting session (and doing possible alterations, as in my case replacing the front panels with wider panels). Shortly after finishing this part of the construction, I learned from 18thcenturystays that you could also double the thread as it's stronger than single thread (so you can do that).


After that, it's time to mark the places for the lacing holes. When I made my first pair of stays this was one of the most puzzling parts for me to figure out and I didn't do it right at first which caused the sides of my stays not to meet evenly at the back. Of course, I hadn't seen Jen of the Festive Attyre's post The zen of the spiral lacing yet so I had to learn this the hard way. Anyhow, I'm just going to take Jen's instuctions a step further and show you how to figure out the places for the lacing holes step by step.

I hope the following makes sense... 

First, mark the upper and lowermost holes to the panels, between the two boning channels. The uppermost hole is 1 cm down from the upper edge of your stays at both front and back. If you've got a front lacing, you can mark the lowermost hole 1 cm away from the lower edge at the front as well. However, at the back the lacing doesn't go all the way down because it isn't necessary. There you mark the lowermost hole at the waist line because you don't need lacing below that. That usually means the spot shown in the diagram below (1.).

Next follows the crucial part in getting the sides of your stays to meet evenly at the back. On the left side of your stays, mark a hole 1 cm away from the lowermost hole and, on the right side, mark one 1 cm away from the uppermost hole (2.).


Then it's time to figure out how many lacing holes you want your stays to have on each side of the back. From 48 extant stays with photos of their backs from my Pinterest, the majority had either 10 (9), 12 (11) or 13 (8) holes but the range was from 7 to 15 holes.

From counting the amount of lacing holes of extant stays with front lacing, I got the range from 6 to 10 with the majority at 8 (6 stays from 12 altogether).*

*I didn't take 1780s partial front lacings, stays with stomachers nor very short 1790s stays into count.

Generally, two things have an effect on how many lacing holes you're going to need:
the distance between your waist and bust line (i.e. the length of the front and back panels of your stays), and - how far from each other you're going to place your holes.

Upon my experience, I would say it's best to place your lacing holes approximately 2,5-2,7 cm away from each other. 3 cm or more is pretty far and 2 cm is pretty close so you'll end up having to stitch more lacing holes and requiring a longer lacing string. Plus, more lacing holes means you're going to spend more time lacing yourself into your stays.

Measure the distance between your marked lacing holes as shown in the diagram below (3.) and divide the distance with 10 in case you want to have 12 holes like I did. (with 11 if you want to have 13 holes and so forth...) I got 2,45 cm this time, which was, as explained, a desirable distance between the lacing holes.

 The last thing to do is to mark the rest of the lacing holes (4.). ;)


Then it's time to stitch your lacing holes. Of course, if I was more true to the "speedy" theme here, I could use metal eyelets but I tend to prefer hand-stitched lacing holes nowadays simply because a) they look accurate and b) it's actually quite fast to make them with the right materials and tools.

You will need to get an awl to make the holes. Preferably a tapered one, unlike mine.


In case you want larger holes than mine you can also try to gently stretch them. Or just make your life easier and get that tapered awl. ;)


Using buttonhole thread, whip-stitch around the hole. Please don't attempt to try to use your regular sewing thread! It will just make the process slower and your lacing holes will be less pretty. Been there, done that, unfortunately...


The first lacing hole done!


Then just keep repeating...


...and repeating...


...until you're done. :)


Below you can also watch an eyelet making video by Burnley & Trowbridge.


After finishing the eyelets, move on to cutting the lining from linen. The lining consists out of four pieces + shoulder straps (+ tabs, if you're doing this the proper way) + a small additional piece(s), as to be explained. Preferably, place the seam in the the middle of your stays as seen in the photo in the link. I cut the lining by using the pattern for the stays but you could also simply lay your stays on the linen and cut around the edges and trim the edges as you go (that's easier and faster if your making an earlier type of stays that lays flat on the floor since it's quite straight without the swooping bust shaping of the 1780s as here). Notice that it's best that you don't cut the parts between the tabs yet, just like earlier.


After cutting the lining pieces, start by pinning your front piece to your stays with the seam allowances turned under and the edges left raw. As you can see from the photo, I already stitched the upper edge of the lining to the stays by machine.


Then stitch the piece around the rest of the edges and whip stitch the turned-under seam allowances to the stays by hand. After the front piece is added, pin the back piece of the lining and repeat the same process as with the front piece. Notice it might be easier for you to to stitch around the tabs by hand with long stitches than with the machine.


Then cut a small piece for the part where the panels of the stays overlap and that you therefore couldn't cut as one with the lining piece. Also, add the lining to the straps. You can easily stitch it around the edges with the machine again. It looks I forgot to take a photo of this part of the construction but it's straightforward enough for you to do without. :)

Then we move on to the last bit that almost everybody says they hate the most when making stays because stays have tabs and they're tricky and binding them makes your fingers sore. I've previously shared some tips about the binding on the blog but I'm not going to assume you've read them or that  you still remember them... so here we go with some tips to make the binding easier for you.

First and foremost, do not attempt to try to use a wide binding tape. The wider, the worse it gets. If you're using precut bias tape, it should be the narrowest kind available (which, I believe, is the 1 cm width). It's going to take quite a bit of skill and patience to get the 1,5 cm wide bias tape beautifully bound around the edges of your stays so spare yourself and don't try to do it. Again, been there, done that. A wider type of binding material simply doesn't end up looking as good as a narrower binding. If you already haven't, take a look at extant 18th century stays and you will notice that the bindings on them are quite narrow and that is for a reason. Anyone who has been making 18th century costumes for a while, has probably also learned that bias tape isn't accurate either (I recommend getting Costume Close-Up  by Linda Baumgarten for more information on this).

At the moment my favorite binding material is 7 mm wide twill tape because it's stretchy so it's easy to get smoothly and beautifully bound around the edges. I also like to start stitching the binding from the inside of the stays because that way you have more control over your binding material later when your binding is already intact on the inside. Plus, you can use more generous and faster stitches on the inside of your stays so you can spare the tiny, beautiful stitches for the outside.


I would advise to stitch the binding completely by hand because it's just much more manageable by hand than by machine - especially if you're a beginner and it's hard for you to stitch very precise parts by machine.

Thirdly, I think the square types of tabs are easier to bind than the rounded ones because you can simply fold the binding at the corners of your square tabs instead of having to gather the binding slightly to get past the round parts smoothly. But I believe this is just a personal preference so you might feel like the rounded tabs are just as easy. However, it seems the rounded tabs are more popular among people who have made 18th century stays simply because popular sewing pattern and guidebooks such as Corsets and Crinolines and Period Costume for Stage and Screen feature them, regardless of the fact on extant stays the square or squarish types of tabs seem to be more common.

For comparison, below is an image with some tabs and bindings that I've used previously. The first is 1 cm wide cotton bias tape on the squarish tabs of my brown KCI stays. While it looks good, it kind of looks a bit off. The binding has definitely started to bug me since this pair of stays took probably the longest for me to make and yet they don't look as perfect as they could. I think it's mainly caused by the binding. It's simply too wide for 18th century, even if the visible part is only 5mm. The second photo on the left shows round tabs with the same material and width so the same problem applies to them. Notice the gathering on the round parts. On the third photo on the upper right we have the same binding material and width again but the tabs are square tabs so the binding is folded over the corners. The last, below right photo shows a pair of stays that I made before any of the other stays seen here, with 1,5 cm polyester satin bias tape. I think that's actually pretty decent work considering how I hadn't been sewing for a very long time at this point yet, but it's definitely a bit uglier than the other bindings. Round tabs + polyester satin + 1,5 cm width isn't an accurate looking combination at all.


And below you can see how much better the narrow binding looks!


And then there's the one last thing to do: adding the lacing holes for the ribbons that hold the shoulder straps and front panels in place.


After that... Congratulations, you're done! :) I hope this tutorial was helpful!

Photos of the finished stays on a mannequin can be found in this separate blog post.