Showing posts with label Fig Leaf Patterns. Show all posts

Sunday, December 18, 2016

Williamsburg print gown photos (Fig Leaf Patterns 101)

In the first post about this gown I only showed you photos of the gown on my mannequin (and a teaser). I've worn the dress three time since then this year so now there are plenty of photos of it being worn. Since I already shared most of my thoughts about this gown and pattern in the original post, this is going to be one picture-heavy post. 

The first time I got to wear this gown was at an 18th century assembly in March. 


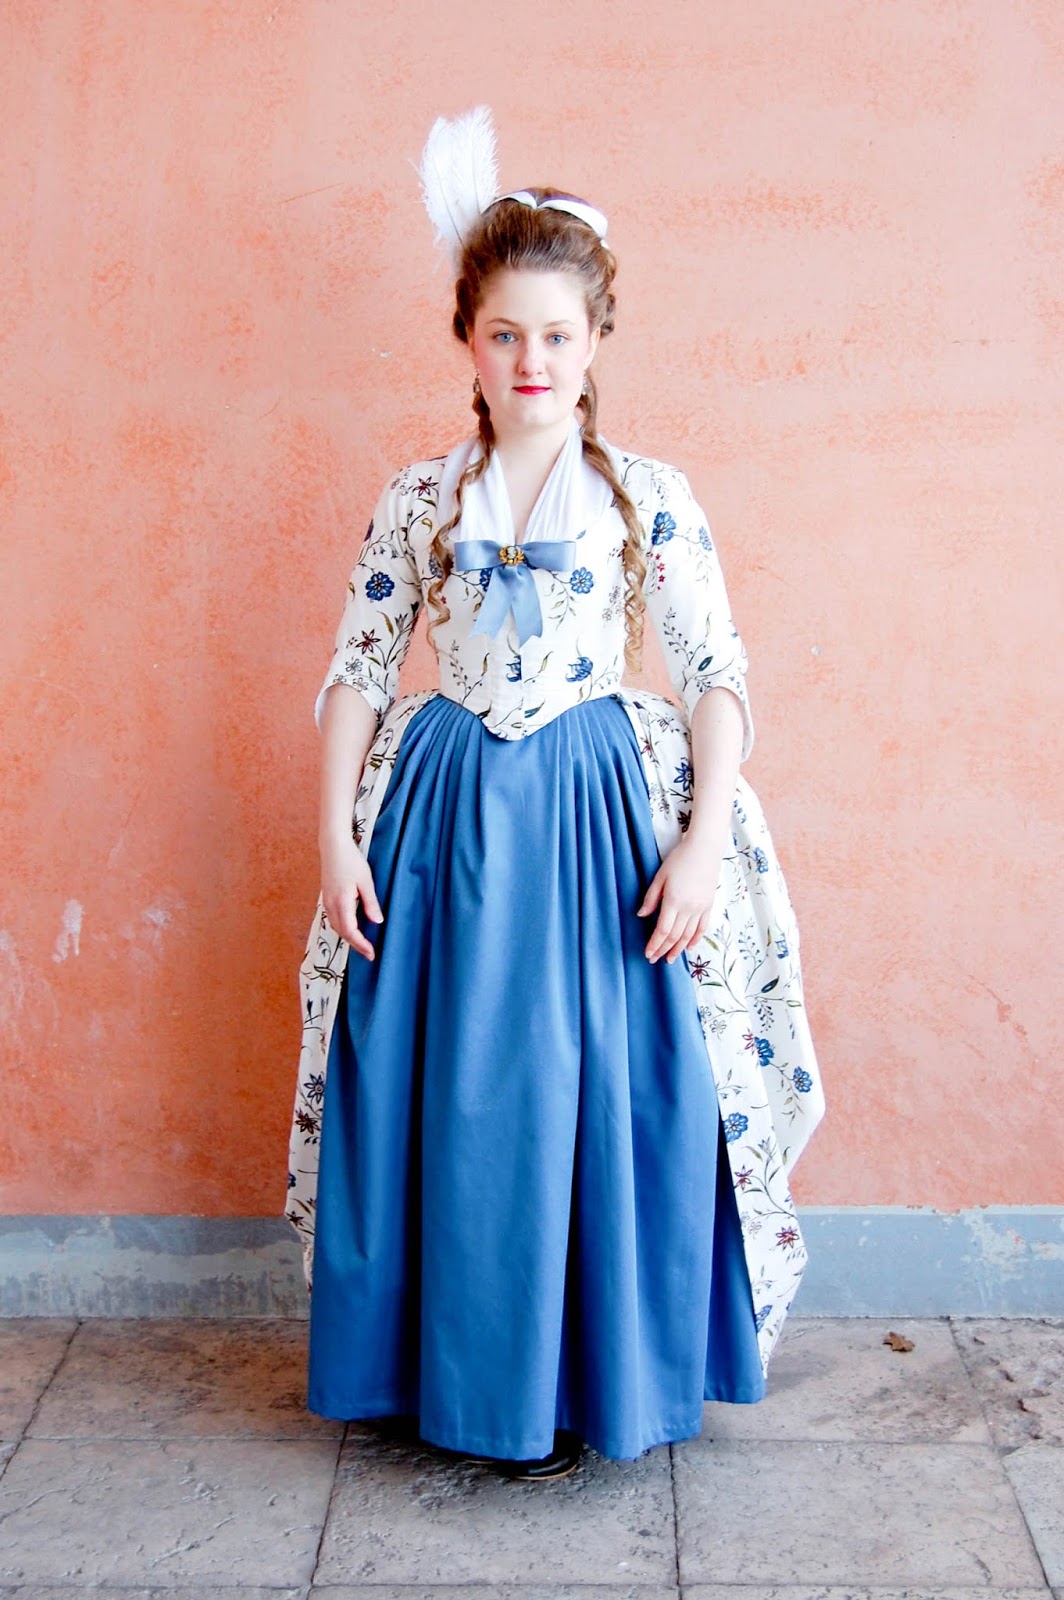
Now here's something I don't think I mentioned earlier - I'm not sure I like how short the bodice is at the front bottom - as you can see, it makes the waistband of the petticoat to show. Also, the skirt of the gown starts from really far at the side so the pocket slits (of the gown and petticoats) do not align, thus making the gown pocket slits useless. Actually, both this and the problem with the petticoat waistband could be fixed just by moving the start of the skirt towards the center front. If you ever plan to use this pattern, you might want consider doing that.


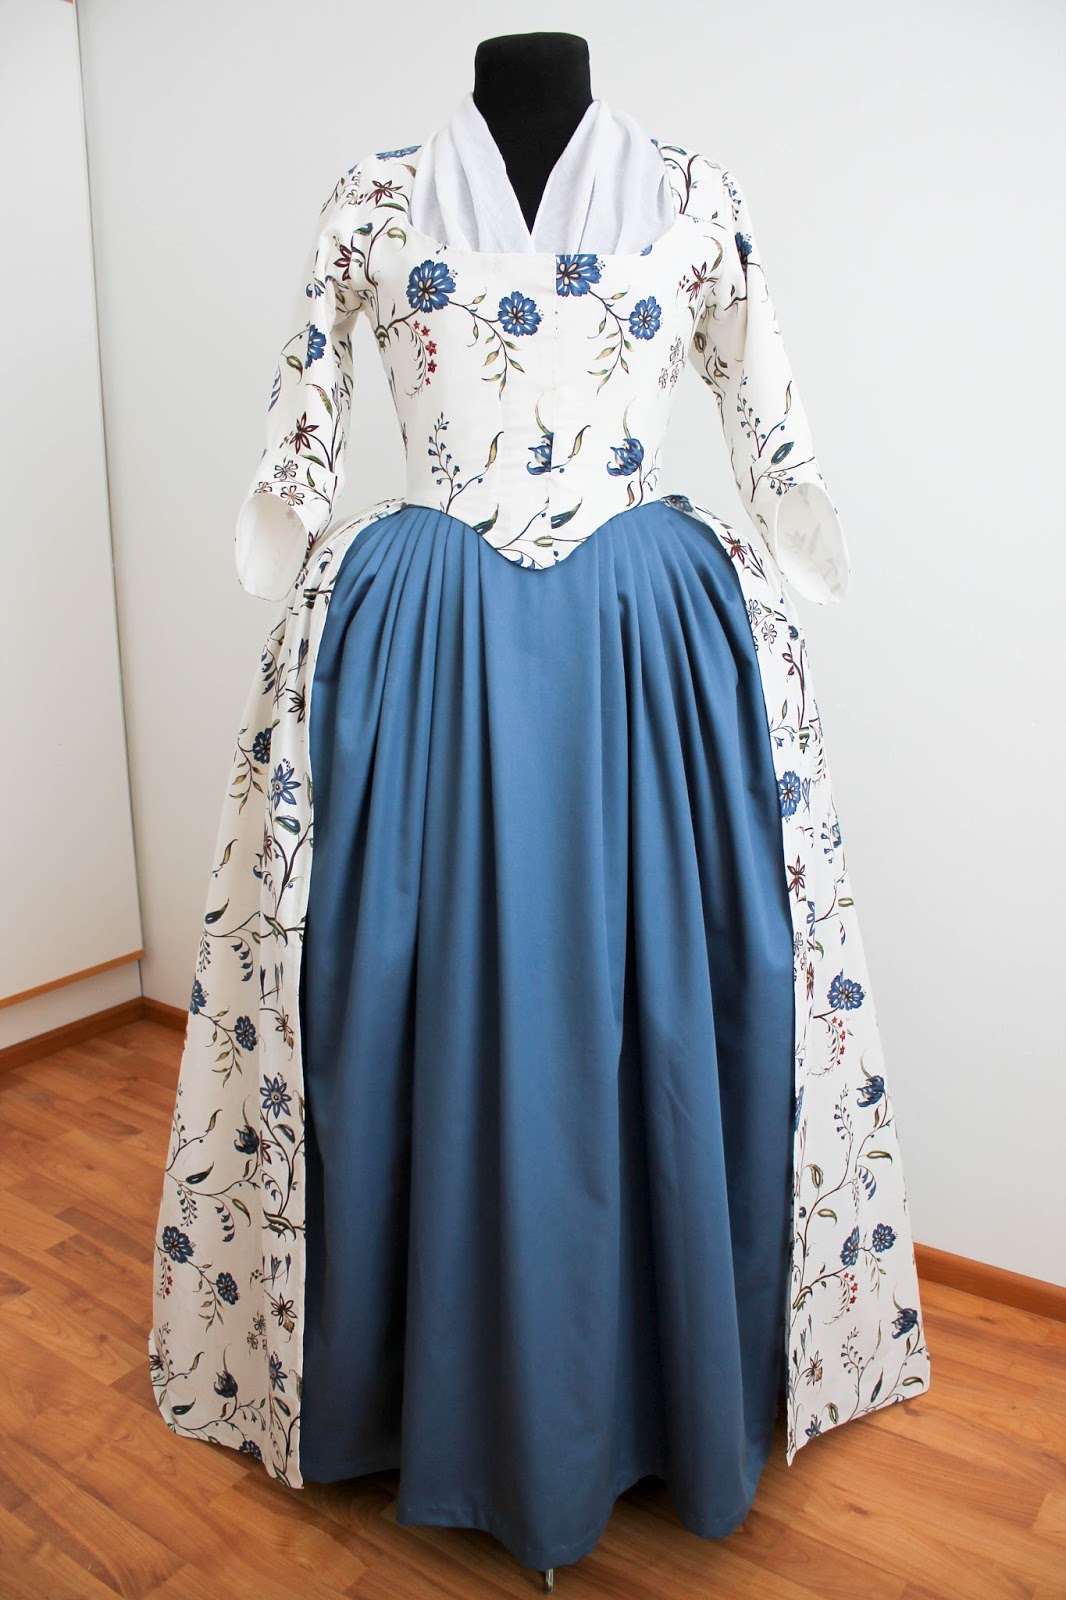
Interestingly, the pattern envelope illustrations do not seem to show the side back seams (or not very clearly anyway). I originally thought the bodice would have just four pieces + shoulder pieces (well, actually it does, because the seams next to center front are tucks). Not that it matters but I figured I should mention.


 And the second time I had the chance to wear this gown was already posted on the blog, at L'Amusette's annual masquerade ball. With a white petticoat, gown skirt hem down, and a black belt the look was a little later than the one above. In the first photo below you can also see how roomy the sleeves originally were (as mentioned in my first post about this gown)!


The gown has a train. Another interesting thing about the pattern is that I didn't have to shorten the skirt even though I'm shorter than average. But the pattern has the original skirt length so I guess that means I'm the same height, from waist down, as the original wearer.


And the third wearing was on the picnic that I also already blogged about. This time the skirt was drawn up with tapes again, to keep the train from getting dirty. I had also made new more tight fitting sleeves (!) so here's how they currently look:


Tuesday, June 28, 2016

Williamsburg print gown (aka yet another floral print robe à l'Anglaise/Fig Leaf Patterns 101)

Can you already tell I'm crazy about cotton prints?

Honestly, after finishing my latest cotton print robe à l'Anglaise I hadn't been planning making yet another floral print gown. There are definitely other projects on my to-do list that I ought to be working on right now. But then Renaissance Fabrics started offering Williamsburg reproduction print cottons and I could not stop myself from getting some 5 yards of this trailing blossoms print in blue because I loved it so much.


This gown was made using Fig Leaf Patterns 101. You can find photos of the original gown, which the pattern is based on, on Pinterest. I simplified the construction a bit so I left the back facing out and decided not to use the large box pleats just because I prefer the look of smaller pleats.


I also decided to close the gown with pins, after using hooks and eyes for the closure method for my center front closing gowns for a few years. I had tried using pins to close gowns a long time ago when I was just starting out with 18th century costume making but I never liked pinning because I thought it was much easier and faster to close a gown with hooks and eyes. However, I found out that pinning hadn't gotten any easier by now. I especially had problems closing the gown at the waist level so that the back would fit closely/tightly enough. I tried stitching tapes to the back of the waist on the inside of the gown to tie in the front in order to keep the back in place but it didn't work out for me, resulting in awful wrinkling of the fabric in the back. So I added lacing plackets to the lining on the front to make pinning easier, as the lacing helps to keep the bodice tight around the body.


There's an extra 1/2 inch on the other side of the center front for adjustability (see photo below). What I'm loving about lacing+pinning is that you can lace yourself into your stays more or less tightly depending on how you feel and that it doesn't matter if you loose or gain a bit of weight over time. 


I first sewed the lacing plackets to the lining only but then started worrying that the linen might stretch due to the pull of the lacing so I decided to stitch through the cotton as well, so that the stitches are visible on the outside. It's not as obvious in the photos as it is in reality. While looking at extant floral cotton gowns, I was really excited to find out that one extant from Met definitely has stitches on the front of the gown so it might be closed in the same manner as mine. 

The plackets have bones in them on both sides of the lacing, in order to and support the eyelets as well as to stop the front from puckering too much .


What I'm not loving so much is that the floral pattern is unintentionally repeated on both sides of the front. Oh well. I never try to match my prints on seams as it wasn't done as economical cutting was usually more important for such cotton or linen gowns


Plus, of course you want to show off your beautiful seaming, especially in the back! 


The back is actually constructed of only two pieces and the seams next to center back seam are achieved with tucks. The lining is without them. 


The gown is worn with my 1770s/1780s underwear


If you're thinking about purchasing this pattern, I say go for it. It comes with a wonderful instructions booklet which I found to be very comprehensive, with everything from information, photos and research about the original gown to general sewing instructions, fitting tips, construction etc. I would imagine this would even be great as your first 18th century gown in case you're just starting out 18th century costume making. 


Also, I think this dress would work the best with a pair of stays like this, without a dramatic difference between waist and bust measurements. I wear a more curvy type of 1780s stays with this dress so I had to add width to the pattern on the front of the bust. However, there are instructions for making such alterations to the pattern in the booklet, so of course you can wear any type of stays you like, but I thought I'd mention that anyhow.

The only suggestion I have is to make the sleeves smaller than in the pattern, since I found them to be really roomy, especially for a period when sleeves are more tight-fitting than earlier.  And I'm a person with a large arms, often resulting in having to cut the sleeves in the next size by comparison to the bodice size. A nifty thing about the sleeves is that there's a triangle piece under the arm, which allows for movement so this is especially great in case you're going to dance or work while wearing the dress.


I've already had two chances to wear this gown. Here's a teaser of how it looks when worn, until I get around doing a proper photoshoot and posting about it... This photo was taken at L'Amusette's spring ball that had an oriental theme.